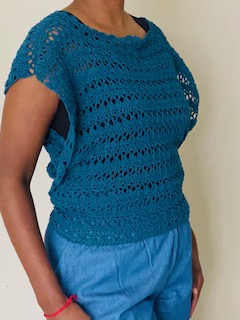
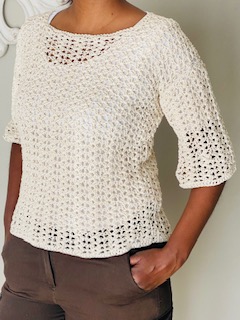
I find that Feminine Feelin’ suits this top. The stitch pattern is so pretty. Was easy too, practically a 3 Round repeat throughout. I saw an Instagram post where this pattern was sewn from fabric and I thought I’d give it a try… only this is my crochet version! Hope you like it 🙂
Pattern Notes
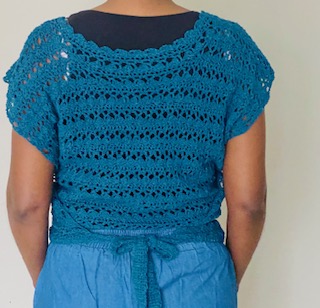
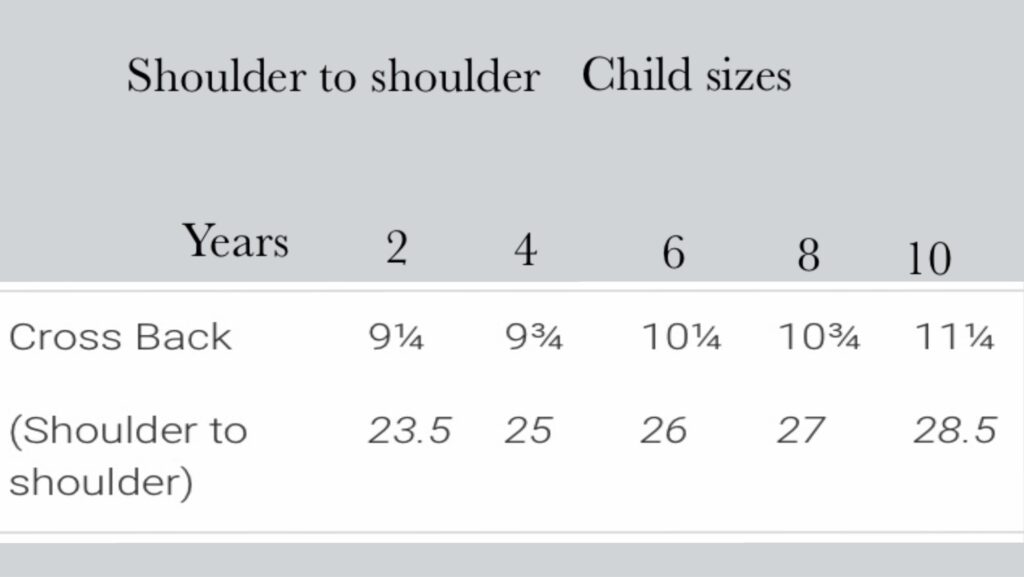
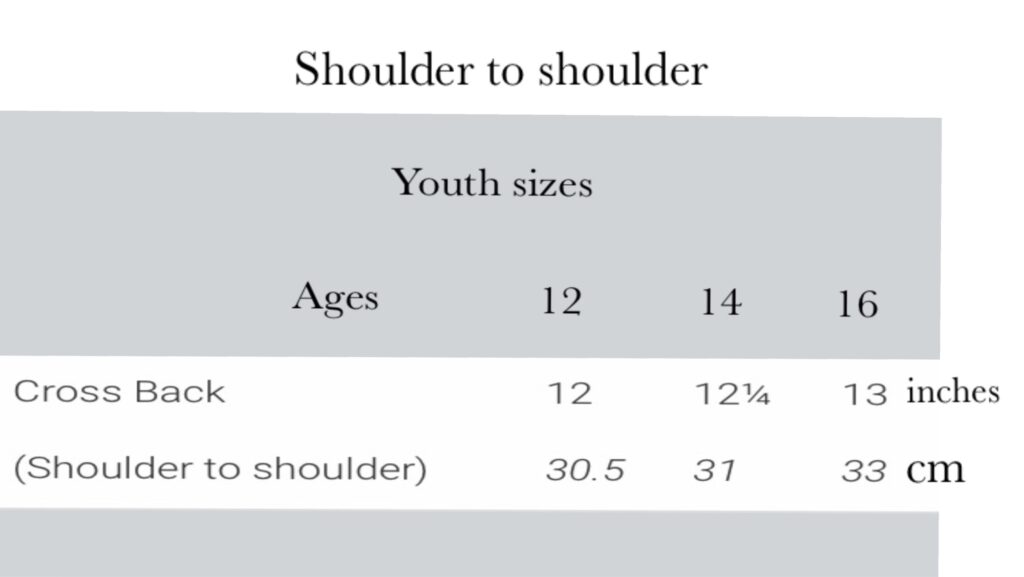
This pattern has no specific sizes – you will be working this pattern using your own body measurements. All standard measurements for sizes from child 2 years to adult 5XL are provided for in the pattern. The pattern is worked bottom up, from the waist to the neckline for both front and back panel. The panels are then joined at the shoulders. the neckline is edged and the front and back ties are worked to complete the Top. Decide on the length from waist to shoulder – this will be your required length. Work the Back Panel first as you will use this panel as a guide for the Front Panel.
- This pattern makes use of US crochet terminology
- Measurements are in inches and centimetres
- 3dc means 3 double crochets
- sc-ch3-3dc means single crochet, ch3 and 3 double crochets all into one st
- dc-ch2-dc means double crochet, ch2, double crochet all into the chain space
- sc6 means 1 single crochet into each of the next 6 stitches
Stitches and Abbreviations
ch/ch’s = chain/s
st/ st’s = stitch/ es
R = Round
sc = single crochet
dc = double crochet
sl st = slip stitch
sk = skip
sp/ sp’s = space /s
ch sp = chain space
SM = stitch marker
CB = Centre Back
CF = Centre Front
Materials
Yarn/ wool – 100% cotton light yarn
3mm crochet hook
Stitch markers
Scissors
Measuring tape
Yarn/ wool needle
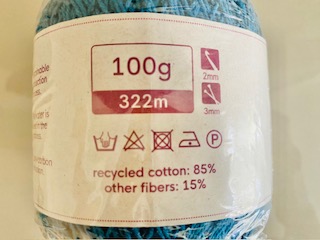
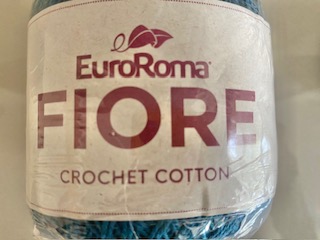
Images of the yarn I used –
Video Tutorial
Check out https://youtu.be/DUFEBLZVTqU
Pattern
Back Panel and Front Panel
Foundation ch
chain a length of chains – This length of chains measures 1 and a half times the shoulder to shoulder measurement


Count the number of chains and adjust to a multiple of 3 by decreasing or increasing – Jot down the number of chains as you will need it for the Front Panel
R1
Into the 4th ch from the hook – dc, dc all ch’s
R2
ch4, turn, into the same st from where the ch4 comes out of – 3dc, *sk2, sc-ch3-3dc*
Repeat from *to* ending with sk2. sc
R3
ch4, turn, *sk3, dc-ch2-dc into ch sp*
Repeat from *to* ending with ch1, dc into last ch sp
R4
ch3, turn, dc into ch1 sp, dc into all dc’s, 1dc into all ch2 sp’s, 1dc into ch1 sp
For Back Panel Only:
- R5 to 1″ or 2,5cm shorter than the required length (see pattern notes) – Repeat R2 to R4
- End on a R4 repeat before continuing to the back neckline
For Front Panel Only:
- R5 to 6 Rounds shorter than the Back Panel – Repeat R2 to R4
- End on a R4 repeat
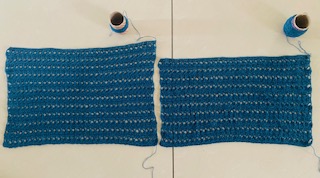
Note: For Children – when you place the Front Panel on top of the Back Panel (laid out flat), the Front Panel is 3 Rounds shorter than the Back Panel
Note: For Adults – when you place the Front Panel on top of the Back Panel (laid out flat), the Front Panel is 6 Rounds shorter than the Back Panel
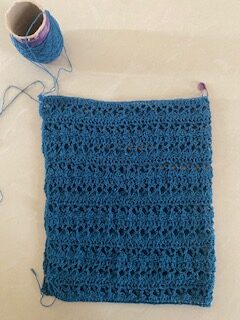
Mark off the Neckline – Back Panel
Fold the Back Panel in half along the width. Place a SM on the folded edge to mark off the CB. Count the number of st’s on either side to confirm CB.
For Children – Count 12 st’s from CB and mark off on one side and on the other side of CB count 11 st’s and mark off – Remove SM at CB. From SM1 to SM2 you now have 24 st’s for the neckline.
For Adults – Count 18 st’s from CB and mark off on one side and on the other side of CB count 17 st’s and mark off – Remove SM at CB. From SM1 to SM2 you now have 36 st’s for the neckline.
Back Shoulder (1)
Continuing from the Back Panel
R1
ch4, turn, into the same st from where the ch4 comes out of – 3dc, *sk2, sc-ch3-3dc*
Repeat from *to* ending with sk2. sc into st marked by the SM
R2
turn, sl st x 3 to get to ch sp – sc into ch sp, ch3-ch2-dc into ch sp, *sk3, dc-ch2-dc*
Repeat from *to* ending with ch1, dc into last ch sp
R3
ch3, turn, dc into ch1 sp, dc into all dc’s, 1dc into all ch2 sp’s, ending with sk last dc and sc into last ch sp
Fasten off, cut off excess yarn
Attach yarn to opposite side for Back Shoulder (2) – see image below
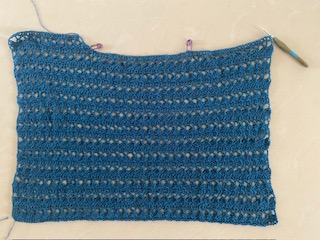
Back Shoulder (2)
Repeat as for Back Shoulder (1)
Fasten off, cut off excess yarn
Mark off the Neckline – Front Panel
Fold the Front Panel in half along the width. Place a SM on the folded edge to mark off the CF. Count the number of st’s on either side to confirm CF.
For Children – Count 9 st’s from CF and mark off on one side and on the other side of CF count 8 st’s and mark off – Remove SM at CF. From SM1 to SM2 you now have 18 st’s for the neckline.
For Adults – Count 12 st’s from CF and mark off on one side and on the other side of CF count 11 st’s and mark off – Remove SM at CF. From SM1 to SM2 you now have 24 st’s for the neckline.
Front Shoulder (1)
Continuing from the Front Panel
R1
ch4, turn, into the same st from where the ch4 comes out of – 3dc, *sk2, sc-ch3-3dc*
Repeat from *to* ending with sk2. sc into st marked by the SM
R2
turn, sl st x 3 to get to ch sp – sc into ch sp, ch3-ch2-dc into ch sp, *sk3, dc-ch2-dc*
Repeat from *to* ending with ch1, dc into last ch sp
R3
ch3, turn, dc into ch1 sp, dc into all dc’s, 1dc into all ch2 sp’s, ending with sc into last ch sp
R4
ch4, turn, into the same st from where the ch4 comes out of – 3dc, *sk2, sc-ch3-3dc*
Repeat from *to* ending with sk2. sc
R5
ch4, turn, sk3, dc-ch2-dc into ch sp, *sk3, dc-ch2-dc*
Repeat from *to* ending with sc into last ch sp
R6
ch3, turn, dc into ch1 sp, dc into all dc’s, 1dc into all ch2 sp’s, ending with dc into ch1 sp, dc into last dc
Stop at R6 for Children
R7
ch4, turn, into the same st from where the ch4 comes out of – 3dc, *sk2, sc-ch3-3dc*
Repeat from *to* ending with sk2. sc
R8
turn, sl st x3, sc into ch sp, ch3-ch2-dc into ch sp, *sk3, dc-ch2-dc*
Repeat from *to* ending with ch1, dc into last ch sp
R9
ch3, turn, dc into ch1 sp, dc into all dc’s, 1dc into all ch2 sp’s, ending with sc into last ch sp
Fasten off, cut off excess yarn
Attach yarn to opposite side for Front Shoulder (2)
Front Shoulder (2)
Repeat as for Front Shoulder (1)
Fasten off, cut off excess yarn
Join Front and Back Panels at the shoulders by seaming together
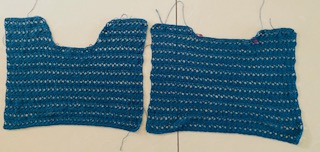
Images above – Front and Back shoulders and neckline
Neckline Edging
Attach yarn at the neckline CB
R1
ch4, into the same st from where the ch4 comes out of – 3dc, *sk2, sc-ch3-3dc*
Repeat from *to* ending with sk2, sl st into the bottom of ch4 to join
Note: You may repeat more Rounds to pick up the neckline
Bands – for the 4 bottom edges
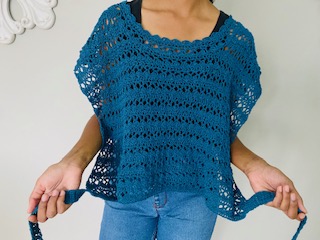
Attach yarn at bottom edge
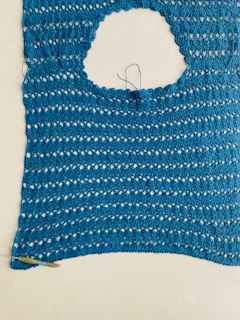
R1
sc6 along bottom edge
R2
ch1, turn, sc6
Repeat R2 to required length of band
Repeat to complete remaining bands
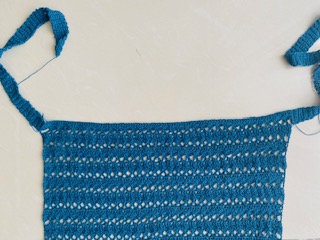
Fasten off, cut off excess yarn, weave in all the ends to complete


Hi there i am kavin, its my first time to commenting anywhere, when i
read this piece of writing i thought i could also create comment due
to this good paragraph.
Wow, this post is fastidious, my younger sister is analyzing these things, thus
I am going to let know her.
I’d like to thank you for the efforts you’ve put in penning this
site. I really hope to see the same high-grade blog posts by you later on as well.
In fact, your creative writing abilities has motivated me
to get my very own blog now 😉
Thank you 🙂
Thank you