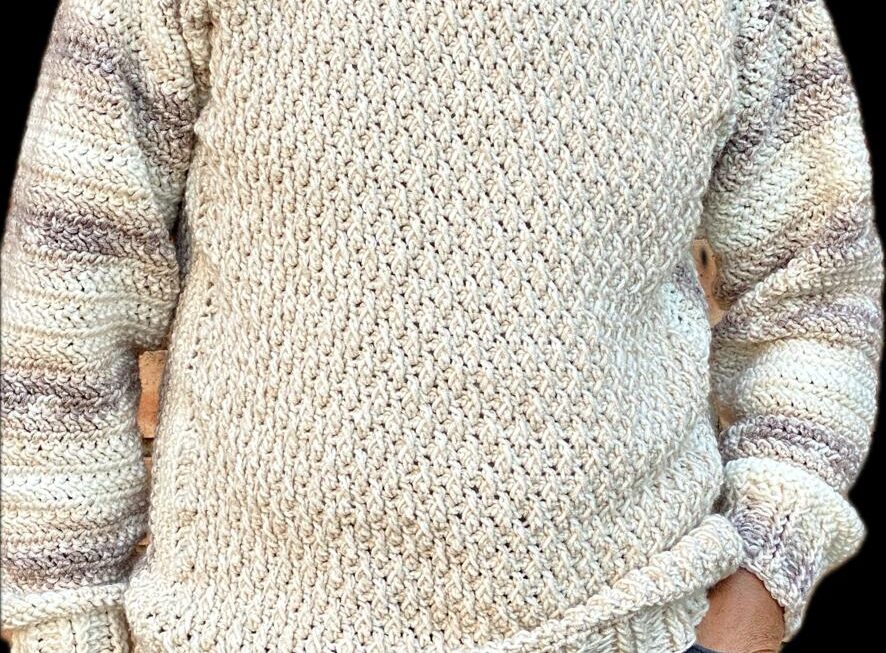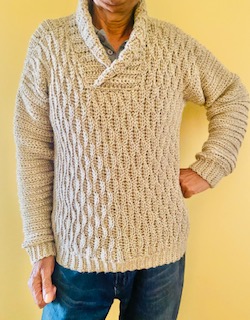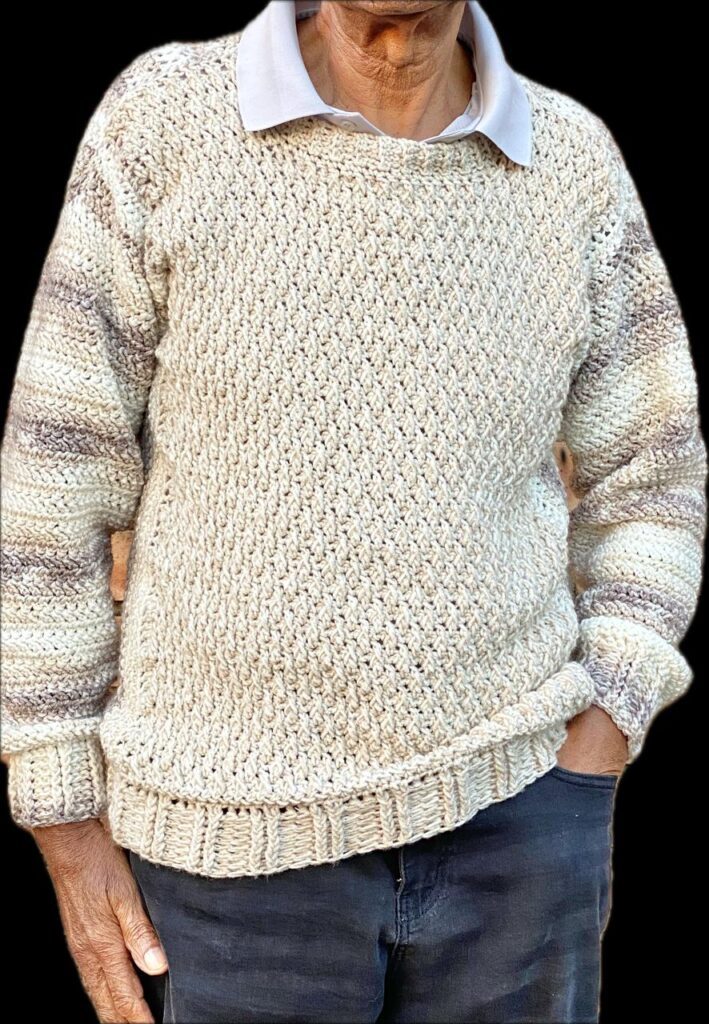
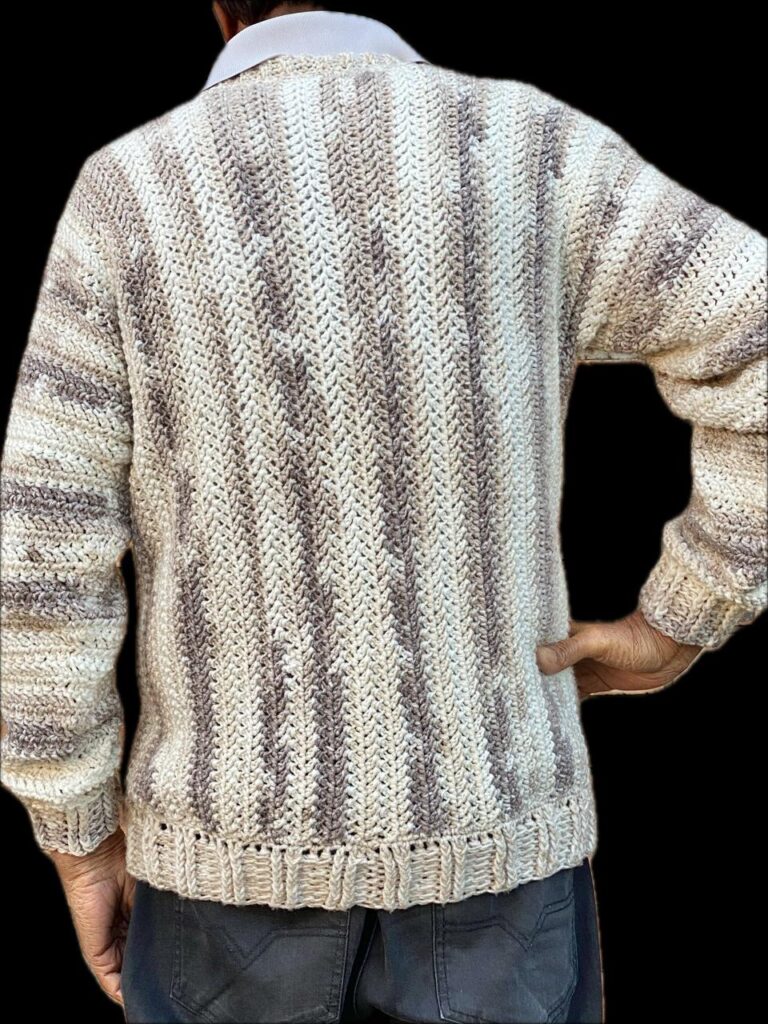
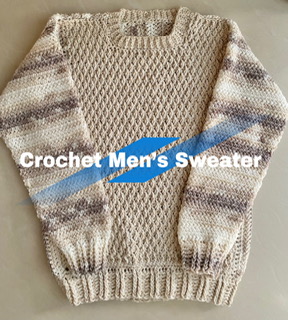
This sweater brings Father’s Day vibes to mind… come to think of it, that’s exactly what I was looking to work up for my father in law. Well, to be honest, I made 2 sweaters (completely different, mind you) and this is the second one of the two. My dad had passed on many years ago so I only have one dad to treat, heck, why not present him two sweaters.
I enjoyed working up this one. The stitch pattern on the front panel, The Alpine Stitch was something else – it kept me on my toes trying not to miss stitches as I worked on. I guess that might be the reason I chose to keep the back panel and sleeve simple, just using double crochets, nevertheless, I had fun. “Every and any excuse to crochet” that’s my motto 😉
Pattern Notes
- This sweater is made using one’s own body measurements – Standard Measurements for the various sizes are provided for in the pattern, however, should you wish to take your own measurements, by all means do so. You will need to take 1 measurement for the length of the sweater
- This pattern makes use of US crochet terminology
- Measurements are in inches and centimetres (cm)
- This pattern is for sizes:
- Men Small to 5XL
- This pattern is worked in panels: Back panel, Front panel, sleeves
- Basic knowledge of stitches needed: single crochet, double, crochet, chain, slip stitch
- I used 2 yarns of the same weight: a two tone for the back panel, front sides and sleeves, a solid tone for the centre front panel and ribbings – see more about the yarn under Materials
- ch2 counts as a stitch (dc)
- Increase (incr) – work 2 stitches into 1 stitch
- Decrease (decr) – yo, insert hook into first st, pull up a loop, insert hook into 2nd st, pull up a loop, yo, go through 3 loops on the hook, yo, go through 2 loops on the hook
- When measuring, do not stretch on the panels to measure
SPECIAL STITCHES
- Front Post Double Crochet (fpdc) – yo, insert the hook into the post of the stitch – going from the front, pull up a loop, yo, go through 2 loops on the hook, yo, go through 2 loops on the hook
- Back Post Double Crochet (bpdc) – yo, insert the hook into the post of the stitch – going from the back, pull up a loop, yo, go through 2 loops on the hook, yo, go through 2 loops on the hook
- Foundation double crochet – ch2, into the first ch – yo, insert the hook into that ch, pull up a loop (you now have 3 loops on the hook), yo, go through 1 loop on the hook creating a chain (take note of this chain that’s formed – it will be the start of the next st), yo, go through 2 loops on the hook, yo, go through 2 loops on the hook (stitch 1 is now complete), *yo, insert the hook into the chain (go through both loops on this chain), pull up a loop (you now have 3 loops on the hook) yo, go through 1 loop on the hook, (take note of this chain that’s formed – it will be the start of the next st) yo, go through 2 loops on the hook, yo, go through 2 loops on the hook* (stitch 2 is now complete)…. Repeat from *to* to complete foundation round
- Herringbone double crochet H(dc) – yo, insert hook into the st, pull up a loop, take the same loop and pull through the first loop on the hook, yo, go through one loop on the hook, yo, go through two loops on the hook
Video Tutorial
Need help with the pattern, check out
Stitches and Abbreviations
ch/ ch’s = chain/s
st/ st’s = stitch/ stitches
sc/ sc’s = single crochet/ s
dc = double crochet
H(dc) = Herringbone double crochet
fpdc = front post double crochet
bpdc = back post double crochet
sk = skip
sl st = slip stitch
sp/s = space/es
WS = Wrong side
RS = Right Side
R = Round
SM = Stitch marker
incr = increase (work 2 stitches into 1 stitch)
decr = decrease
yo = yarn over
blo = back loops only
CF = centre front
CB = centre back
Materials
Yarn/ wool – Double Knit/ category 3/ light worsted (I used approx. 760g for a size Medium – also depending on the length)
4mm crochet hook for the ribbings
5mm hook for the rest of the sweater
Scissors
Stitch markers
Measuring tape
Yarn/ wool needle
PATTERN
Back Panel – using Herringbone double crochet
Back (Shoulder 1)
R1
Chain a foundation double crochet (see pattern notes) that measures from the shoulder to the upper hip – when measuring consider that the ribbing measures 3″or 8cm (Take note of the number of stitches as you will need this number when working the sides of the front panel) (I used 68 st’s for my foundation Round)
R2
ch2, turn, H(dc) all st’s
Repeat R2 until the width of the back panel measures the shoulder measurement for the size you are making
Measurements for Shoulder (1) and (2)
S 6,5” or 16,5cm
M 7” or 18cm
L 7,5” or 19cm
XL 8” or 20,5cm
2XL 8,5” or 21,5cm
3XL 9” or 23cm
4XL 9,5” or 24cm
5XL 10” or 25,5cm
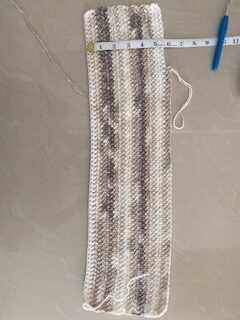
Image above showing Back panel shoulder (1) complete
Continue to Neckline
Neckline
Continuing from Shoulder (1)
R1
ch2, turn, H(dc) all st’s – leaving the last 4 st’s unstitched
R2
ch2, turn, H(dc) all st’s
Repeat R2 until the width of the neckline measures the neckline measurement for the size you are making
Neckline Measurements
S, M, L 6” or 15,5cm
XL, 2XL, 3XL 7” or 18cm
4XL, 5XL 8” or 20,5cm
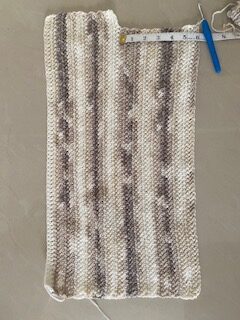
Image showing shoulder (1) and neckline complete
Continue to Shoulder (2)
Shoulder (2)
Continuing from the Neckline – at the top edge (if you are not at the top edge (Neckline) work a Round to get to the top edge)
R1
ch6, turn, into the 4th ch from the hook – H(dc), H(dc) all ch’s and all st’s
R2
ch2, turn, H(dc) all st’s
Repeat R2 until the width of shoulder (2) measures the shoulder measurement for the size you are making
Fasten off, cut off excess yarn
Find CB by folding the panel in half lengthwise – mark off the folded edge at the neckline as CB – see image below
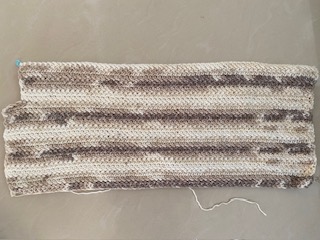
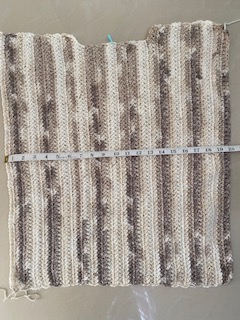
Image above – Back Panel complete
Front Panel
Centre Front – using the Alpine Stitch Pattern
R1
Chain a foundation double crochet (see pattern notes) according to the stitch count for the sizes as follows: S 42, M 44, L 46, XL 46, 2XL 48, 3XL 50, 4XL 50, 5XL 52 st’s
R2
ch1, turn, sc into same st as ch1, sc all st’s S 42, M 44, L 46, XL 46, 2XL 48, 3XL 50, 4XL 50, 5XL 52 st’s
R3
ch2 (counts as a dc), turn, *dc, fpdc*
repeat from *to* ending with a dc into the last st S 42, M 44, L 46, XL 46, 2XL 48, 3XL 50, 4XL 50, 5XL 52 st’s
R4
ch1, turn, sc into same st as ch1, sc all st’s S 42, M 44, L 46, XL 46, 2XL 48, 3XL 50, 4XL 50, 5XL 52 st’s
R5
ch2 (counts as a dc), turn, fpdc,*dc, fpdc*
repeat from *to* ending with a 2dc S 42, M 44, L 46, XL 46, 2XL 48, 3XL 50, 4XL 50, 5XL 52 st’s
Repeat R2 to R5 until the Centre Front Panel measures 3” or 8cm shorter that the Back Panel
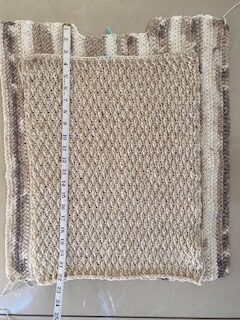
Image above showing Front panel 3” or 8cm shorter than back panel
Do not fasten off
Find CF by folding the Front Panel in half lengthwise – mark off the folded edge as CF – see image below
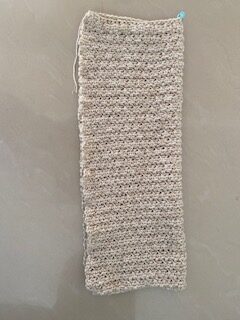
Place the Front Panel on top of the Back Panel – Align CB and CF – using the back panel as a guide, mark off the shoulders on the front panel – Make certain that both shoulders have the same stitch count
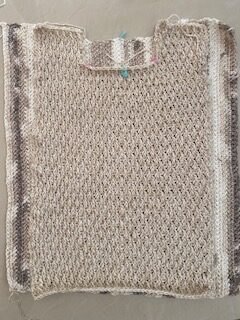
Also note the number of Rounds to be worked to bring up the width of the front panel to match the back panel (using the back panel as a guide) – I needed to work 6 Rounds on either side of the Centre Front Panel
Front Shoulder (1)
Continuing from the Centre Front Panel to SM
Continue with the Alpine Stitch pattern until the length is the same as the back panel – I worked 8 Rounds to complete the shoulder
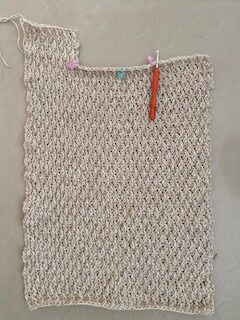
Image showing front shoulder (1) complete – attach yarn to SM on the opposite side to work shoulder (2)
Fasten off – cut off excess yarn
Front Shoulder (2)
Attach yarn to SM at next shoulder
Repeat as for Shoulder (1)
Fasten off – cut off excess yarn
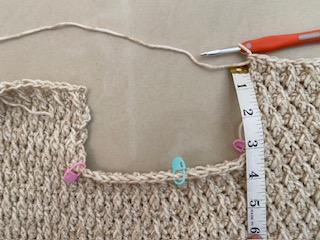
Front Side Panel (1)
Attach yarn to the side of the front panel at the bottom edge
R1
ch2, dc all along the length of the centre front panel – the number of stitches worked must be the same as the number of stitches from the Back Panel foundation Round (Note: there are no st’s to work into – make certain to work your stitches evenly throughout this Round, working your st’s into the little gaps along the side edge)
R2
ch2, turn, H(dc) all st’s
Repeat R2 until the front panel aligns with the back panel (I worked 6 Rounds)
Fasten off, cut off excess yarn
Front Panel Side (2)
Attach yarn to the opposite side of the front panel at the top edge
Repeat as for Front Side (1) Panel
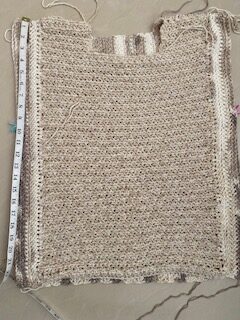
Fasten off, cut off excess yarn. Now both Front and Back panels are of the same width and length
Joining Back and Front panels
With the back panel laid out flat, place the front panel on top (aligning well) (RS facing in) – Seam along the shoulders
With the front panel on top of the back panel, mark out the armhole depth (for the sleeves) – Measure along the length of the panels from the top edges on either side going down – Place SM’s to mark off on both layers – Seam along the edges from SM’s going down to the ribbings to join the Front panel to the Back panel along the sides – leaving the armholes unseamed
Armhole Depth:
MENS MEASUREMENTS
S 7,5 inches 19cm
M 8 inches 20cm
L 8,5 inches 21,5cm
XL 9 inches 23cm
2XL 10 inches 25,5cm
3XL 10,5 inches 26,5cm
4XL 11 inches 28cm
5XL 11,5 inches 29cm
Neckline Ribbing
Attach yarn to Neckline at CB
R1
ch1, sc into same st as ch1, sc all around the neckline, sl st to join
R2
ch5, into the 2nd ch from the hook sc, sc remaining ch’s (4st’s), sl st into each of the 2 st’s along the neckline to join ribbing to neckline
R3
sk 2 sl st’s, sc remaining st’s (blo) (4st’s)
R4
ch1, turn, into the 2nd ch from the hook sc (blo), sc remaining ch’s (blo) (4st’s), sl st into each of the 2 st’s along the neckline to join ribbing to neckline
Repeat R3 and R4 all around the neckline
When the start of the ribbing and the end of the ribbing meets, fasten off, leaving behind a long enough tail to help with seaming – Seam the ends of the ribbing to join
Sleeve
Attach yarn to the armhole at the underarm
R1
ch2, H(dc) all around the armhole, sl st to join
R2
ch2, turn, H(dc) all around the armhole, sl st to join
Repeat R2 to required length of sleeve – consider that the ribbing measures 3”or 8cm
Work decreases once you reach the elbows to taper of the sleeve – work decreases after every 3 Rounds as follows:
Decrease Rounds – ch2, turn, decr, H(dc) to last 2 st’s, decr, sl st to join
Sleeve Ribbing
Continuing from sleeve
R1 (RS)
ch2, dc all st’s, sl st to join
R2 (RS)
ch2, *fpdc, fpdc, bpdc, bpdc*
repeat from *to* to end, sl st to join
Repeat R2 to complete the ribbing – Work fpdc’s into fpdc’s and bpdc’s into bpdc’s (I worked 9 Rounds in total to complete the ribbing)
Fasten off, cut off excess yarn. Repeat for other sleeve
Bottom Edging
Attach yarn to bottom of sweater at CB
R1
ch2, dc all around the bottom edge, sl st to join
Note: there are no st’s to work into – work your st’s evenly throughout the Round into the gaps along the bottom edge
R2 (RS)
ch2, *fpdc, fpdc, bpdc, bpdc*
repeat from *to* to end, sl st to join
Repeat R2 to complete the ribbing – Work fpdc’s into fpdc’s and bpdc’s into bpdc’s (I worked 9 Rounds in total to complete the ribbing)
Note – If you wish to tighten up on the ribbing, work decreases every now and then by working a fpdc into 2 posts
Fasten off, cut off excess yarn, weave in all ends to complete
