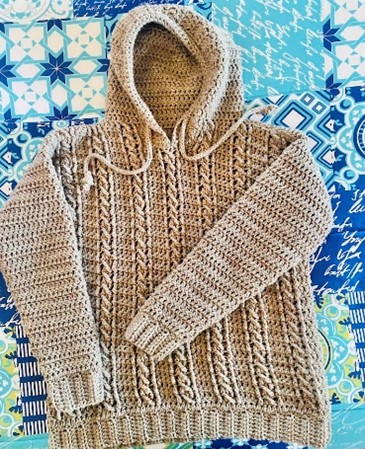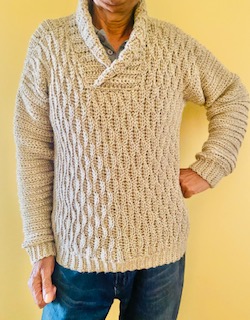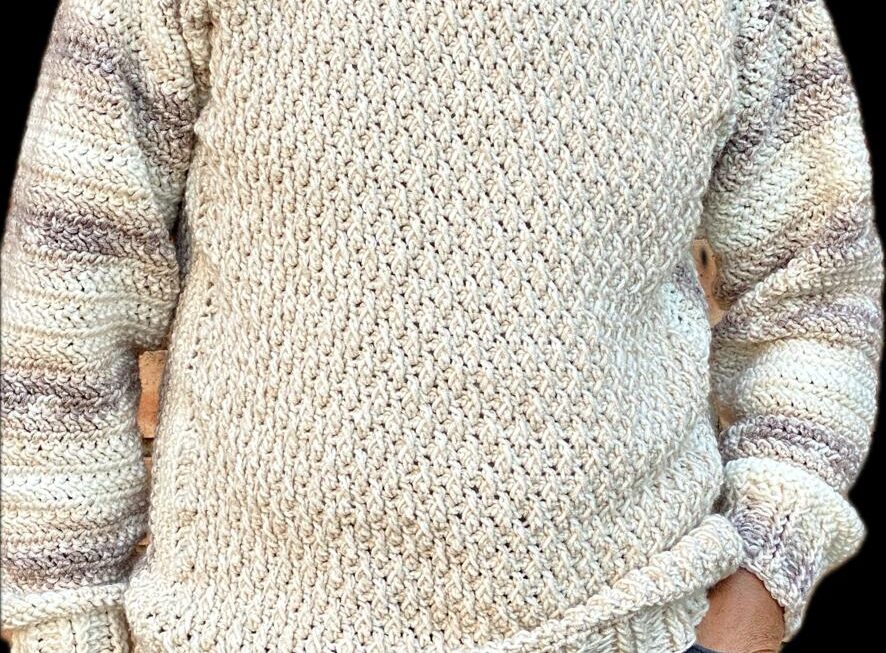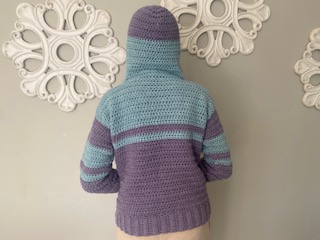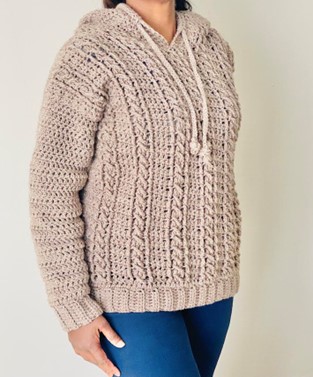
I made this sweater for my girls and I. It’s great because I use body measurements for the construction. That way I know for sure that the completed sweater is going to fit. This pattern is from child sizes 2 years to adult 5XL making it incredibly versatile. The hoodie had to be rounded, lol, that’s the only way I like it!
Pattern Notes
- This sweater is made using one’s own body measurements – Measurements for the various sizes are provided for in the pattern, however, should you wish to take your own measurements, by all means do so. You will need to take 2 measurements (1) shoulder (2) Hoodie (explained below)
- This pattern makes use of US crochet terminology
- Measurements are in inches and centimetres (cm)
- This pattern is for sizes:
- Women XS to 5XL
- Should you not know what size you fall into – physically take your shoulder to shoulder measurement (this measurement is taken using a measuring tape, from the edge of the shoulder on one side – going across the neckline to the edge of the other shoulder) and match it to the shoulder to shoulder measurements provided – the measurement closest to the one taken is the size you will use
- For the shoulder measurement – measure from the edge of the shoulder to the neck (Use this measurement for both shoulders – no need to measure the other shoulder)
- For the Hoodie measurement – measure from the notch at the base of the head (where the neck and head meet) to the crown
- I used an Aran/Worsted (category 4) yarn with a 5mm hook for the Ribbings and a 6mm hook for the Yoke, Body, Hoodie and and Sleeves
- Knowledge of basic stitches – chain, single crochet, half double crochet, double crochet, slip stitch, front post triple crochet (fptc explained below)
- Front Post Triple Crochet (fptc) – yo twice, insert the hook into the post of the stitch – going from the front, pull up a loop, yo, go through 2 loops on the hook, yo, go through 2 loops on the hook, yo, go through 2 loops on the hook
- Cable – fptc, sk1, fptc, fptc, fptc into skipped st, fptc (Note that the cable uses up 5 st’s)
- Decrease with a single crochet (decr(sc)) – insert the hook into the stitch, pull up a loop, insert the hook into the next stitch, pull up a loop, yo, go through 3 loops on the hook
- Stitch count of 8+3 means – first, get your stitch count to a multiple of 8 and then add on 3 stitches
- ch2 counts as a stitch (hdc)
- ch3 counts as a stitch (dc)
- Cord
Make a slip knot leaving a long tail of yarn. Insert the hook into the slip knot *Wrap the tail end of the yarn over the hook, while holding onto the knot from the slip knot, yarn over, go through both loops on the hook * Repeat from *to* to required length
Stitches and Abbreviations
ch/ ch’s = chain/s
st/ st’s = stitch/ stitches
sc/ sc’s = single crochet/ s
hdc = half double crochet
dc = double crochet
fptc = front post triple crochet
sk = skip
sl st = slip stitch
sp/s = space/es
WS = Wrong side
RS = Right Side
R = Round
SM = Stitch marker
incr = increase (work 2 stitches into 1 stitch)
decr = decrease (work 1 stitch into 2 stitches)
yo = yarn over
decr(sc) – decrease with a single crochet
blo = back loops only
CF = centre front
Materials
Yarn/ wool Aran (category 4/ Worsted) (I used approx. 760g for a size Medium, and 820g for a Large – also depending on the length)
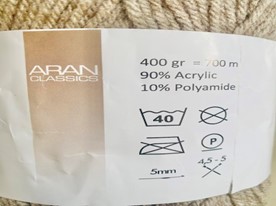
Image of the Yarn/ Wool I used
5mm and 6mm Crochet hooks
Scissors
Stitch markers
Measuring tape
Yarn/ wool needle
Need help with this pattern, check out my tutorial on https://youtu.be/bzgMD8K3wFw
PATTERN
Shoulder to shoulder measurements
WOMENS MEASUREMENTS
XS 14,5 inches 37cm
S 15 inches 38cm
M 16 inches 40,5cm
L 17 inches 43cm
XL 17,5 inches 44,5cm
2X 18 inches 45,5cm
3X 18 inches 45,5cm
4X 18,5 inches 47cm
5X 18,5 inches 47cm
Back Panel
Ribbing – using the 5mm hook
ch9
R1
Into the 3rd ch from the hook – hdc, hdc all ch’s (8 st’s including the turning ch)
R2
ch2, turn, hdc (blo) all st’s (8 st’s)
Repeat R2 until the Ribbing measures the shoulder to shoulder measurement
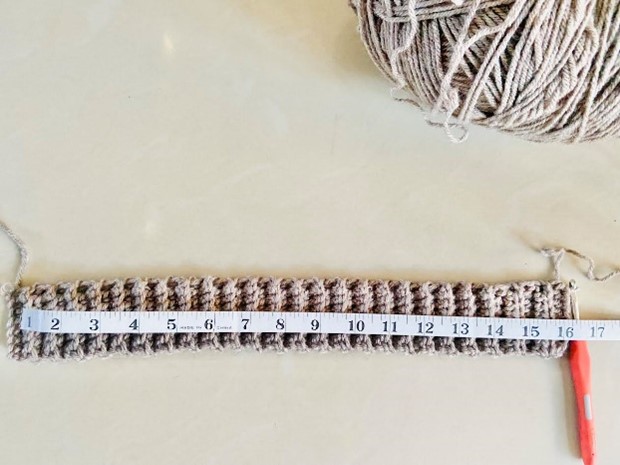
Image above – Ribbing measures 16” for a size M
Back Body – continuing from the Ribbing
R1 (work across the Ribbing lengthwise) – using the 5mm hook
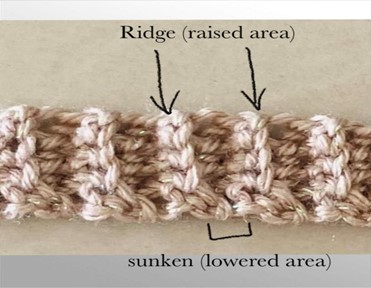
ch1, sc into same space as ch1, sc all across the length of the Ribbing – 1sc per ridge and 2sc per sunken space (see image below)
Change to the 6mm hook
R2
ch3, turn, dc all st’s
R3 to Required length – Repeat R2
Fasten off – cut off excess yarn
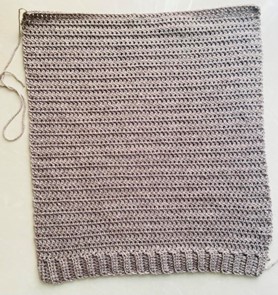
Image above – Back Panel complete
Front Panel
Ribbing – using the 5mm hook
ch9
R1
Into the 3rd ch from the hook – hdc, hdc all ch’s (8 st’s including the turning ch)
R2
ch2, turn, hdc (blo) all st’s (8 st’s)
Repeat R2 until the Ribbing measures the shoulder to shoulder measurement plus 2 inches/ 5cm
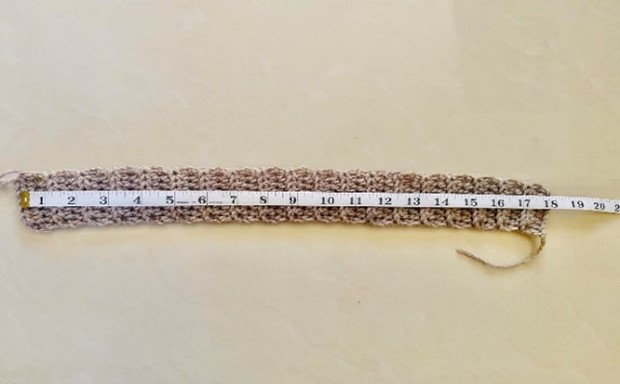
Image above – Ribbing measures 18” for a size M (16”+2”)
Front Body – continuing from the Ribbing
R1 (work across the Ribbing lengthwise) – using the 5mm hook
ch1, sc into same space as ch1, sc all across the length of the Ribbing – 1sc per ridge and 2sc per sunken space
Count the number of stitches for R1 and adjust to a multiple of 8+3 in R2
Change to the 6mm hook
R2
ch3, turn, dc all st’s (stitch count must be in multiples of 8+3 – adjust as needed)
R3
ch3, turn, 2dc, *fptc, sk1, fptc, fptc, fptc into skipped st, fptc, 3dc*
Repeat from *to* to end
R4
ch1, turn, sc into the same st as ch1, sc all st’s
At this point, it is important to check that the width of the Front Panel is the same as the width of the back panel (as we all work our stitches to a different tightness). To check – with the Back Panel laid out flat, place the Front Panel on top – aligning the Ribbings. Should the Front Panel be wider than the Back Panel, you need to undo R4, R3, R2 and R1 – remeasure the Ribbing and repeat R1 to R4. Should the Panels be more or less (an inch and a half/ 1cm) the same in width, continue with R5
R5 to 3 inches/ 8cm before required length (the front panel must be 3 inches/ 8cm shorter in length than the back panel)
Repeat R3 and R4 (stopping at a R4 repeat)
TIP: always ensure that you are only using up 5 st’s per cable and 3 st’s per set of dc – Keep track of your st’s on the WS for the cable and make certain that you always end with 3dc
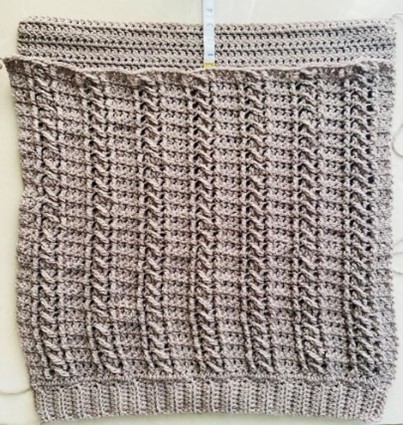
Image – Front panel complete – 3” shorter than back panel
Front Neckline
Mark off neckline – Find the CF which will be the set of 3dc or the cable – Mark off with 2SM’s on either side of the 3dc or the cable
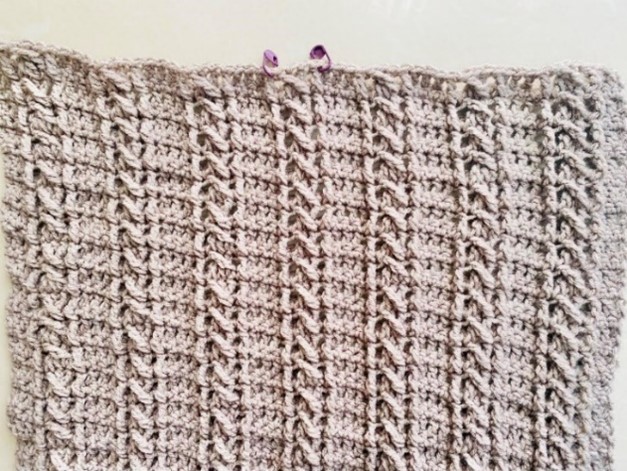
Image – Find CF
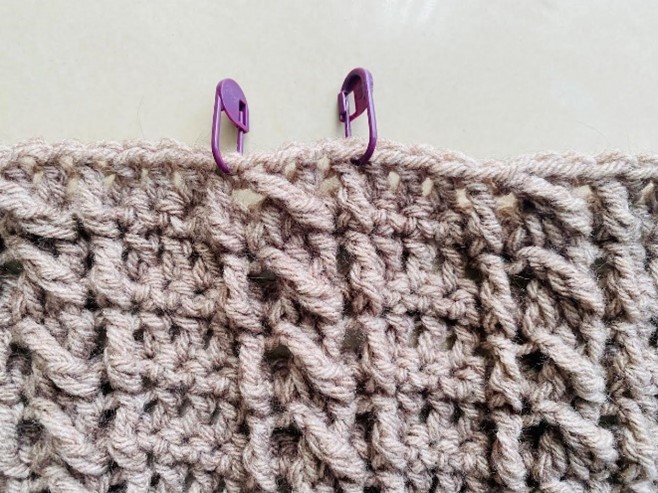
Image – CF at Cable
OR
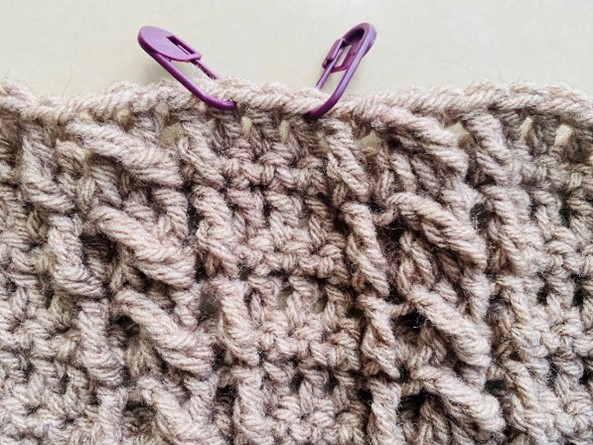
Image – CF at 3dc
Front Side (1)
- Using the 6mm hook, continuing from the Front Panel
Repeat R3 to SM, turn Repeat R4 (continue until you have worked 3 inches/ 8cm)
Fasten off, cut off excess yarn
Front Side (2)
- Using the 6mm hook, continuing with the RS facing up, attach yarn to the stitch directly after the 2nd SM (skipping the stitches in-between the two SM’s)
Repeat R3 to end, turn Repeat R4 to SM (continue until you have worked 3 inches/ 8cm)
Note – if you are beginning R3 with a dc, ch3 for the first dc and thereafter continue with the stitch pattern OR if you are beginning R3 with a fptc, ch4 for the first fptc and thereafter continue with the stitch pattern
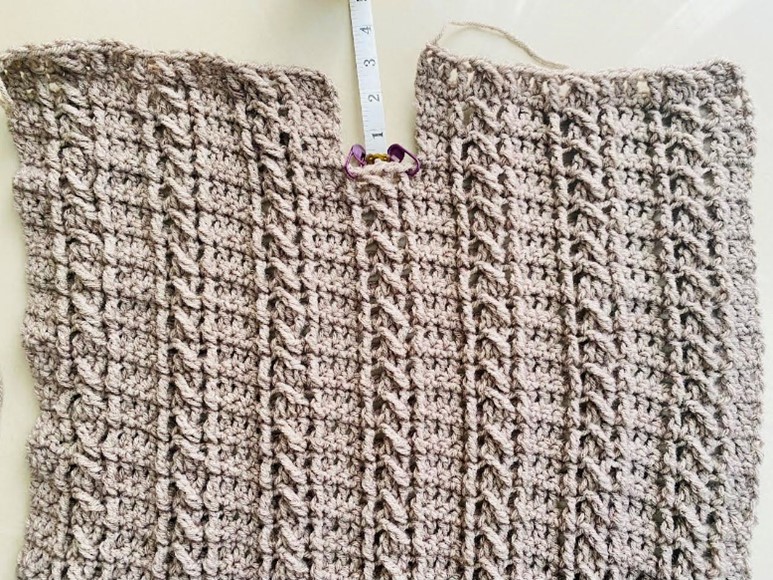
Image – Front Panel complete
Fasten off, cut off excess yarn
Joining Back and Front panels
Measure shoulder on one side of back panel along the top edge (using the shoulder measurement – see pattern notes) – Mark off with a SM (Jot down the number of st’s measured as you will now use this number of st’s to mark off the shoulder on the remaining side of the back panel and the shoulders on the front panel – Mark off using SM’s. With the back panel laid out flat, place the front panel on top (aligning well) (RS facing in) – Seam along the marked off shoulders. With the front panel on top of the back panel, mark out the armhole depth (for the sleeves) – Measure along the length of the panels from the top edges on either side going down – Place SM’s to mark off on both layers – Seam along the edges from SM’s going down to the ribbings to join the Front panel to the Back panel along the sides – leaving the armholes unseamed
Armhole Depth:
WOMENS MEASUREMENTS
XS 6 inches 15cm
S 6,5 inches 16,5cm
M 7 inches 18cm
L 7,5 inches 19cm
XL 8 inches 20cm
2XL 8,5 inches 21,5cm
3XL 9 inches 23,5cm
4XL 9,5 inches 24cm
5XL 10 inches 25,5cm
Sleeve
Ribbing (to fit around the wrist) – using the 5mm hook
ch9
R1
Into the 3rd ch from the hook – hdc, hdc all ch’s (8 st’s including the turning ch)
R2
ch2, turn, hdc (blo) all st’s (8 st’s)
Repeat R2 until the Ribbing fits around the wrist
Sleeve – continuing from the Ribbing
R1 (work across the Ribbing lengthwise) – using the 5mm hook
ch1, sc into same space as ch1, sc all across the length of the Ribbing – 1sc per ridge and 2sc per sunken space
Change to the 6mm hook
R2
ch3, turn, dc into same st as ch3 (counts as first incr), dc all st’s, incr into last st
R3
ch3, turn, dc all st’s
R4
ch3, turn, dc all st’s
Repeat R2, R3 and R4 until the top edge of the sleeve measures twice the armhole depth (find measurement above)
Thereafter, repeat R4 until required length of sleeve
TIP: to find the required length of the sleeve, fold the sleeve lengthwise in half – place the top folded edge under the arm with the ribbing at the wrist – this gives you an indication of the length of the sleeve
Fasten off – cut off excess yarn
Repeat for other sleeve
Fold sleeve lengthwise in half and seam along the edges – Repeat for other sleeve.
With the body of the sweater laid out flat (RS facing in), insert the sleeve (RS facing out) into the armhole – align opening of sleeve to armhole space, matching the seam of the sleeve to the seam at the underarm – Seam along to join sleeve to armhole – Repeat for other sleeve
Hoodie
Rounded Hoodie
Attach yarn to the outer top edge of the front panel on one side
R1
ch3, dc to the other end of the front top edge of the front panel (so you are working from the front panel, along the back panel and back to the front panel on the other side)
R2
ch3, turn, dc all st’s – work an incr on either side of the hoodie (where the sides fold) (2 increases in total)
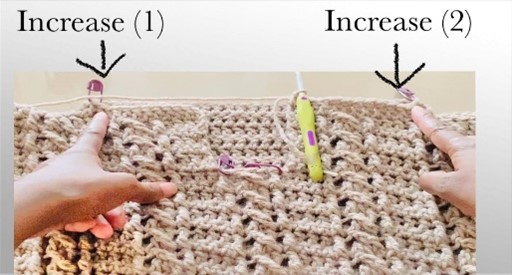
R3
ch3, turn, dc into all st’s
Repeat R3 until the hoodie measures from the notch at the base of the head to the crown of the head (Hoodie measurement – see pattern notes)
Fold along the width (top edge) of the hoodie – place a SM to mark off the folded edge – CF
*ch3, turn, dc to 2 st’s before SM at CF, decr(sc), sc into the st marked by the SM (CF) (replace SM), decr(sc), dc to end*
Repeat from *to* 8 times in total
Fasten off, leaving a long tail to help with the seaming
Fold the hoodie in half again and seam together the top edges to close up the hoodie
Fasten off – cut off excess yarn
Edging around the hoodie
Attach yarn to the Neckline (on the side of the 3dc or cable at CF)
R1
ch1, sc into same space as ch1, sc all around the hoodie to the opposite side of the 3dc or cable at CF (Note: there are no actual stitches to work with – ensure that you stitches are even throughout the R)
R2
ch1, turn, sc into same st as ch1, sc all st’s
R3 to R6
Repeat R2
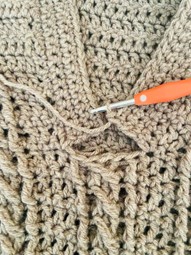
Image – Edging around hoodie
Fasten off, cut off excess yarn
Attach bottoms of Edging to Neckline (3dc or cable at CF) by seaming
About 4 inches/ 10cm away from the Neckline at CF, along the edging of the hoodie, encase the cord (see pattern notes) and seam around the hoodie (ensure that you do not seam the cord to the hoodie – the cord in only encased into the edging) – Work to 4 inches/ 10cm on the opposite side of CF
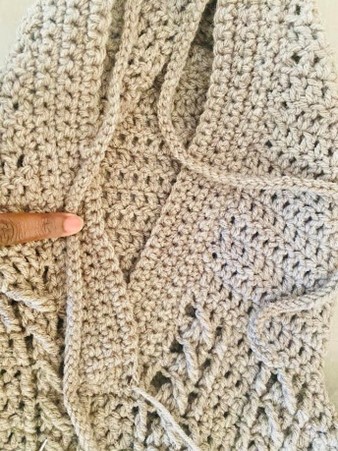
Image – 4inches/ 10cm away from the Neckline – CF
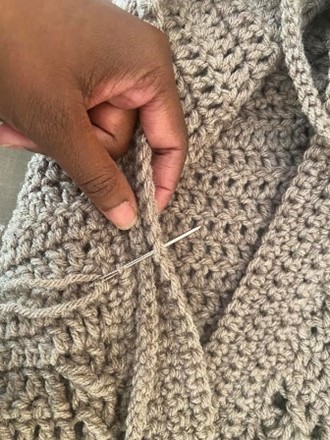
Image – encasing the cord within the Edging
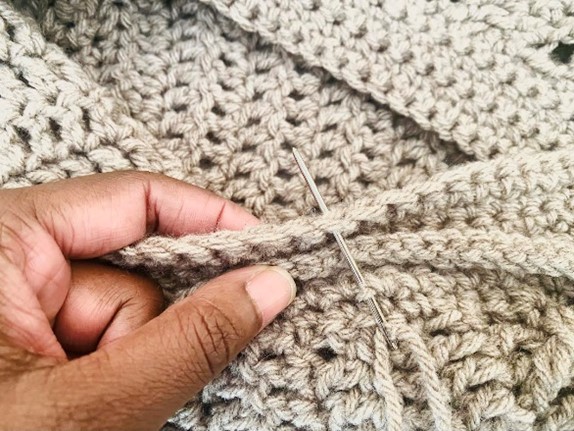
Image – cord encased within the Edging around the hoodie
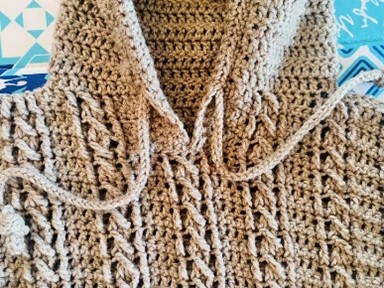
Weave in all ends to complete
