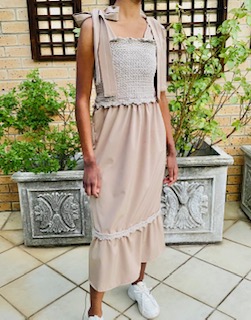
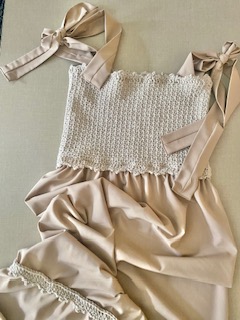
I always get inspiration from watching tv or going window-shopping. It’s amazing when inspiration strikes, it can happen at anytime or anywhere for that matter. I saw this dress, or at least a fully fabric version of it in a magazine and thought I’d give it a shot only this time with crochet and fabric. I made this for my daughter and she’s chuffed with the end result.
This dress is completely adjustable. You can loosen up on the body of the dress, but definitely not tighten up on it as the pattern makes for a rather close or tight fit to the body of the dress. I chose to go tight on the body of the dress as I got quite a good stretch from the yarn that I used. You may also get more gathers just by increasing on the width of the fabric pieces. So, yes, adjustable it is and I’ll explain more on this topic as we get into the pattern.
When stitching always align CB (Center Back) seams
Let’s talk materials
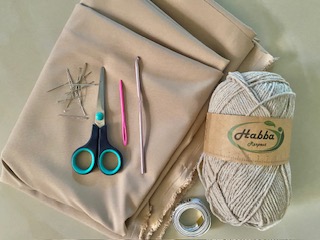
Yarn/Wool
It’s the first time I used the yarn that I did. Here’s an image of the label
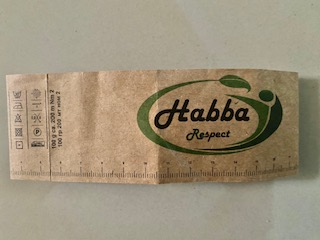
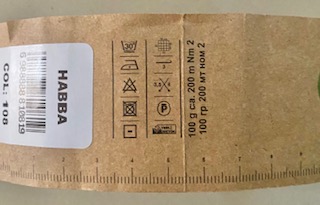
I was surprised the note from the yarn label that it’s 85% Acrylic and 15% Polyester and that it’s a recycled yarn (no idea what that means or how it’s made) but nevertheless it worked great. I got good stretch from it. If you’re wondering why I was surprised, it’s just that the yarn looked and felt a lot like cotton yarns do. The recommended hook on the label read as a 3mm hook and each skein or ball of yarn was 100g. I used just short of 2 skeins approx. 150g for a size Small. You can use Acrylic or Cotton yarns 4ply or Double Knit/ light worsted/category 3 – just note that cotton yarns do not have much of a stretch as Acrylics do and the stretch factor is important here. We will be making the body of this dress using yarn and this has to stretch over the shoulders and bust/chest to be worn.
Other materials needed are a pair of scissors, yarn/wool needle, measuring tape. These you need for the crochet part of the dress.
Fabric
For the fabric, any suitable dress fabrics will do. I’m talking about fabrics that are not sheer, flimsy, see-through or excessively stretchy. The fabric I used was soft and flowy, it was not sheer or see-through, it had a tiny amount of stretch to it, barely any, almost little to none. I asked for fabrics that are good for dresses at my local fabric store and this was recommended to me. The label on the roll of fabric read “dress fabric” so that made it easy for me!
Elastic
While at the fabric store, I also asked for elastic. The elastic, who would have thought, it’s hidden in that dress somewhere! Now to join something with stretch, in this case, the crochet body of this dress, to something that’s not stretchy (lol, simply put) like the fabric I used, the elastic plays an important role here. It actually becomes the transition between the yarn component and the fabric component. Without the elastic, you cannot join the crochet body to the fabric, there will be no stretch and the dress can’t be worn as it cannot stretch over the body. The elastic I used was .5″ or 1cm in width and the length all depends on the size that you are making.
Apart from the fabric and elastic, you will also need a measuring tape, a pair scissors, sewing pins and the all important sewing machine. This project has to be sewn using a sewing machine for the best outcome.
Video Tutorial
Need help with this pattern, check out my video tutorial
Let’s talk Measurements
- Bust/Chest – given below
Child/ Youth
2yrs 21″ or 53,5cm
4yrs 23″ or 58,5cm
6yrs 25″ or 63,5cm
8yrs 26,5″ or 67,5cm
10yrs 28″ or 71cm
12yrs 30″ or 76cm
14yrs 31,5″ or 80cm
Women
XS 30″ or 76cm
S 34″ or 86,5cm
M 36″ or 91,5cm
L 42″ or 106,5cm
XL 46″ or 117cm
2XL 50″ or 127cm
3XL 54″ or 137cm
4XL 58″ or 147,5cm
5XL 60″ or 154cm
- Hip measurements – given below
Child/Youth
2yrs 22″ or 56cm
4yrs 23,5″ or 59,5cm
6yrs 25″ or 63,5cm
8yrs 28″ or 71cm
10yrs 29,5″ or 75cm
12yrs 31,5″ or 80cm
14yrs 33″ or 84cm
Women
XS 34″ or 86,5cm
S 36″ or 91,5cm
M 40″ or 101,5cm
L 44″ or 112cm
XL 48″ or 122cm
2XL 53″ or 134,5cm
3XL 55″ or 140cm
4XL 57″ or 144cm
5XL 62″ or 157cm
- Length – from waist to underarm. This measurement is needed for Part (1). You will need to physically take this measurement
- Length – from waist to just above the knee. This measurement is needed for Part (2). You will need to physically take this measurement
- Length – from just above the knee to required length. This measurement is needed for Part (3). You will need to physically take this measurement. The required length is the length you would like to dress at – this determines how long or short the dress will be.
As we get into the pattern, you’ll see that it’s just a bunch of rectangles that make up this dress. I know that sounds crazy, but it’s true! Here’s proof, an image of what the pattern basically looks like:
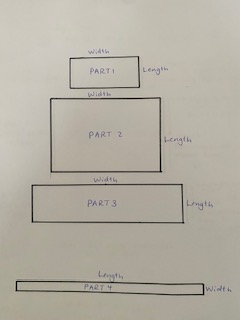
Let me go a step further by explaining this image
Part (1) is the crochet part of the dress – see PART (1) below for Pattern
Part (2) This makes up the upper portion of the skirt part of the dress. Its fabric that’s cut by length and width.
- Length
take the measurement from the waist to just above the knee
- Width
This measurement is the Hip measurement plus a quarter of the Hip measurement
Example: size Small
Hip = 36″ or 91,5cm
1/4 Hip = 9″ or 23cm
Width = Hip + 1/4Hip = 45″ or 114,5cm
Note: Use the Hip measurement for the size that you are working and calculate as above
Seam allowance – add on 3/4″ or 1,5cm
Adjustments – For more gathers, use half the hip measurement instead of a quarter
Part (3) This makes up the last portion of the skirt part of the dress. Its fabric that’s cut by length and width.
- Length
take the measurement from just above the knee to the required length
- Width
This measurement is the Hip measurement plus half of the Hip measurement
Example: size Small
Hip = 36″ or 91,5cm
1/4 Hip = 18″ or 46cm
Width = Hip + 1/4Hip = 54″ or 137,5cm
Note: Use the Hip measurement for the size that you are working and calculate as above
Seam allowance – add on 3/4″ or 1,5cm
Adjustments: For more gathers, use double the hip measurement
Part (4) Straps
Cut out 4 straps measuring 5″ or 12,5cm in width and to your required length. The straps already have seam allowance added on
It is advisable to cut out the lengths of fabric for Parts 2, 3 and 4 and have them ready.
PART (1)
Crochet Body of Dress
Pattern Notes
This is the crochet part of the dress and you’ll find the pattern for this down below
To work Part (1) of the dress you will need the bust/chest measurement and the length. Use the bust/chest measurement from the table below for the age or size you are working on or alternatively take your own bust/chest measurement, if you are able to do so.
In the pattern there’s mention of “required length”. This pattern or at least this part of the pattern is worked bottom up, that is, from the waist to the underarm, and that is the required length. You will need to physically take this measurement from underarm to waist.
Stitches and Abbreviations
ch/ch’s = chain/s
st’st’s = stitch/es
R = Round
yo = yarn over
dc = double crochet
sc = single crochet
sk = skip
sl st = slip stitch
RS = Right Side
WS = Wrong Side
sc-ch2-sc means single crochet, chain2, single crochet all worked into one stitch
sc-ch4-sc means single crochet, chain4, single crochet all worked into one stitch
Pattern
Foundation Round – R1
ch4 (counts as ch1 and dc), insert hook into the first chain, pull up a loop, yo, go through one loop on the hook (take note of this ch as you will begin the next st in this ch), yo, go through two loops on the hook, yo, go through two loops on the hook (we’ve now worked the 2nd dc), *insert hook into the ch, pull up a loop, yo, go through one loop on the hook (take note of this ch as you will begin the next st in this ch), yo, go through two loops on the hook, yo, go through two loops on the hook* (we’ve now worked the 3rd dc)
Repeat from *to* until the length of the Foundation Round measures the Bust measurement for the size that you are working – see image below showing the Foundation Round measuring 34″ for a size Small
Note: Do not stretch the Foundation Round when measuring
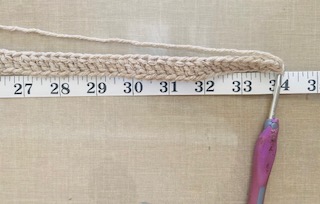
Now, count the number of stitches and adjust to an even number (either work an extra stitch or remove a stitch to adjust). In order to work the stitch patter we need an even number of stitches.
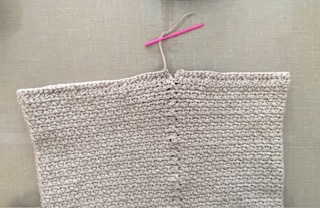
Join first st (the 4th ch from the initial ch4) to last st to form a ring. Ensure that this entire ring is not twisted. Notice that there’s a “little notch” that’s formed when joined – we will seam this closed later on in the pattern
R2
ch, turn, into the same stitch from where ch1 comes out of sc, ch1, sk1, *sc, ch1, sk1*
Repeat from *to* to end. sl st to join
R3 to required length (see Pattern Notes) – Repeat R2
Last Round
ch2, turn, dc all st’s, dc all ch1 sp’s, sl st to join
Here’s an image of the Body completed
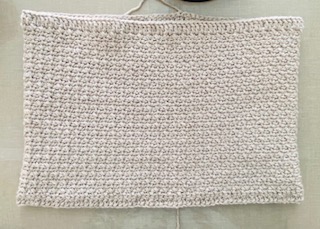
Fasten off and cut off excess yarn
Seam the little notch that was formed when joining the Foundation Round to form a ring to close.
Stitching the Dress
Working with fabric from Part (2)
Stitch the length on either side to join – Overlock to neaten edges
Using the crochet body as a guide, measure elastic – see image below – cut the elastic to size (elastic must be able to fit around the crochet body, without stretching the elastic)
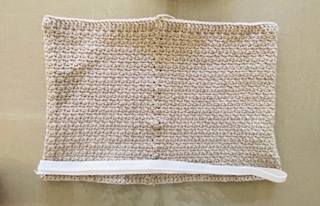
Stitch on the elastic to the top edge of fabric Part (2)
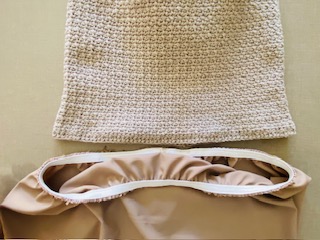
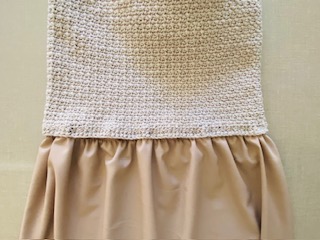
Pin the bottom edge of the crochet body to the elasticated top edge of fabric Part (2) – Align CB – Stitch to join
Working with fabric from Part (3)
Stitch the length on either side to join – Overlock to neaten edges
Gather along the top edge of fabric Part (3) so that the top edge of Part (3) aligns with the bottom edge Part (2) – Align CB – Stitch to join top edge of Part (3) to bottom edge of Part (2)
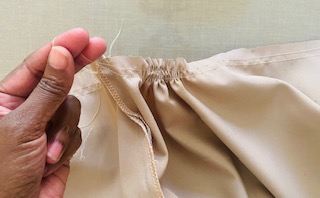
Overlock and neaten seam along bottom edge of Part (3)
Shoulder Straps – Fold each strap in half, lengthways and stitch. Turn RS out and fold edges inwards and stitch to neaten
Stitch shoulder straps in place
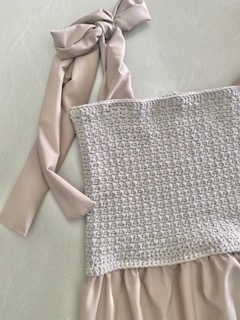
Crochet Edging
Attach yarn to top of Crochet Body
ch1-sc-ch3-sc, *sk2, sc, sk2, sc-ch2-sc, sc-ch4-sc, sc-ch2-sc*
Repeat from *to* ending with sk2, sc, sk2, sc-ch2-sc, sl st to join
Work edgings as need be
Optional : I worked a Foundation Round and stitched this onto the seam in-between Part (2) and Part (3), I then edged this.
Neaten all edges, weave in all ends to complete
And that does it, easy peasy! Be sure to let me know how you got on making this dress in comment section💕
