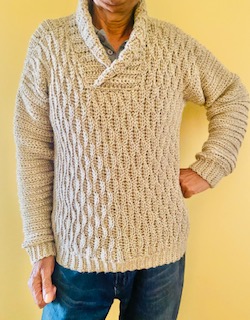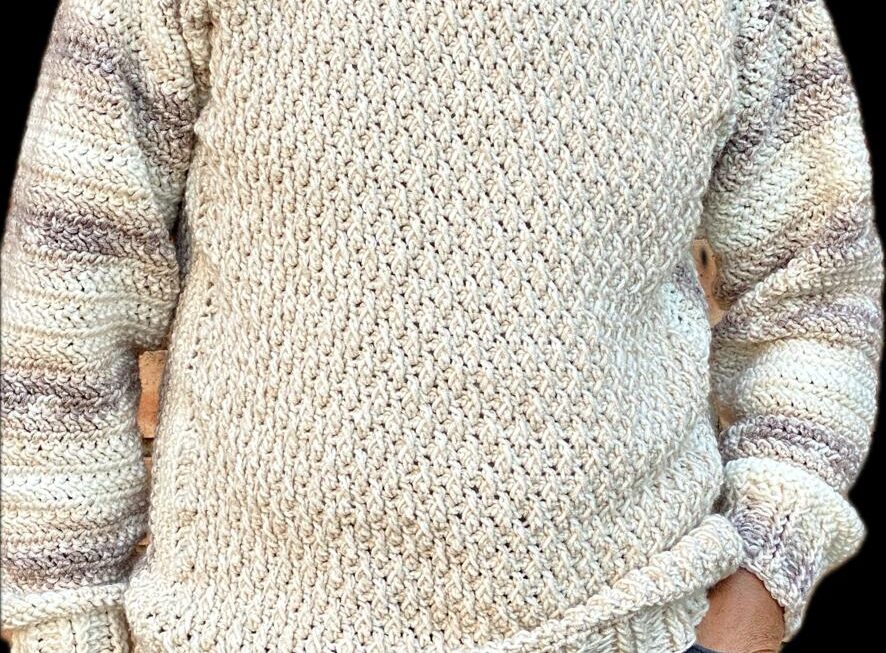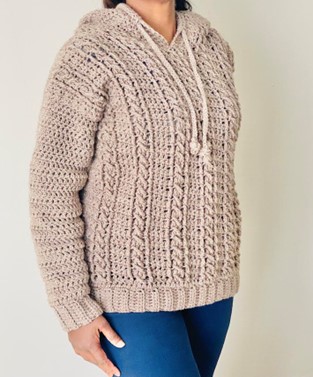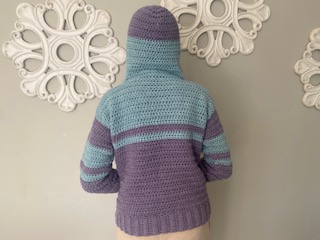
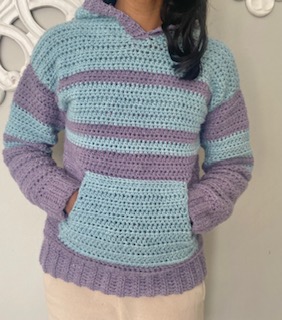
I wanted a pattern that was a “one for all and all for one” pattern and so I worked up this Crochet “Everyday 4 Everyone” Basic Hoodie. What that means is that this pattern is a comfortable, everyday, whenever, wherever kinda sweater and best of all it’s for everyone, child sizes from 2 years to 14 years, women sizes from XS to 5XL and men sizes from S to 5XL. Sticking with the theme of being basic, I kept it easy, only using basic stitches to work it up. It’s quick to make and it’s beginner friendly.
Pattern Notes
This pattern makes use of US crochet terminology
Measurements are in inches and centimeters
This pattern is an easy pattern and is suitable for beginners. Knowledge of basic stitches needed: half double crochet, single crochet, slip stitch.
This pattern is worked in panels and in 4 parts. We begin with the ribbings for the front and back panels, then working those panels to the required length. The front panel is worked shorter that the back panel to accommodate the shoulders and neckline. We assemble the front and back panels by joining at the shoulders. Then its on with the sleeves which are worked separately and then fitted and seamed into the armhole spaces. Now it’s time to work the hoodie and the pocket and these are worked directly onto the sweater.
You may freely change colors of yarn as and when needed to create stripes within the pattern.
For this pattern, measurements for (1) Shoulder to Shoulder, (2) Armhole depth, (3) Arm Length are given for the standard sizes: Child sizes from 2 years to 14 years, Women sizes from XS to 5XL and Men sizes from S to 5XL
For this pattern, you will need to physically take the following measurements:
- Required Length
(1) This is the actual length of the sweater. This measurement is taken from the shoulder to the upper hip.
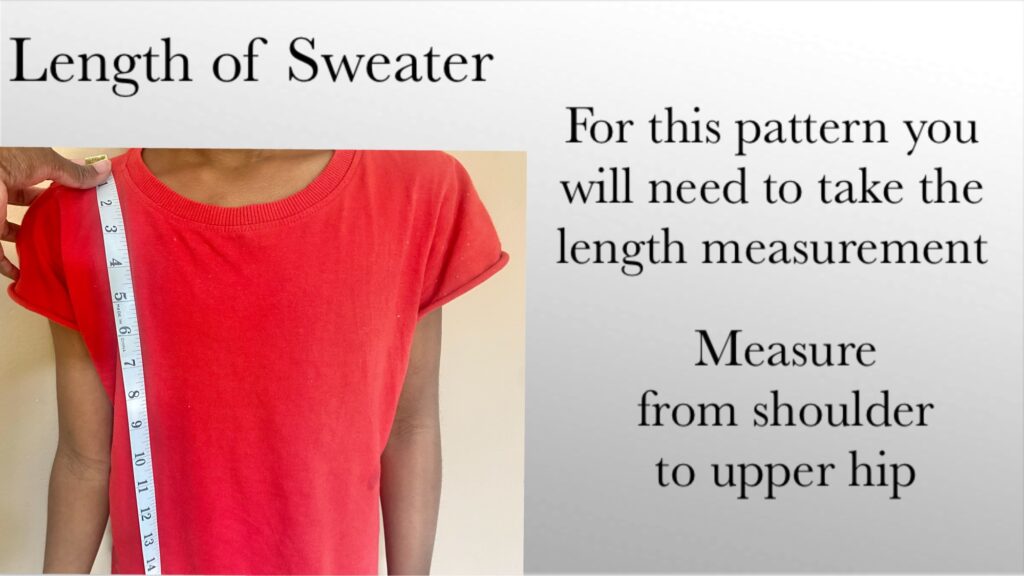
(2) For the Front and Back panel ribbings, this is the length that measures the Shoulder to Shoulder measurement for the size you are working and for the Sleeve ribbings, this is the length of the ribbing when fitted around the physical wrist.
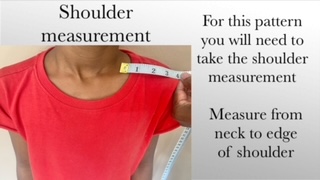
- Shoulder Measurement
This measurement is needed to mark off the shoulders on the front and back panels before joining. This measurement is taken from the outer edge of the shoulder to the neck.
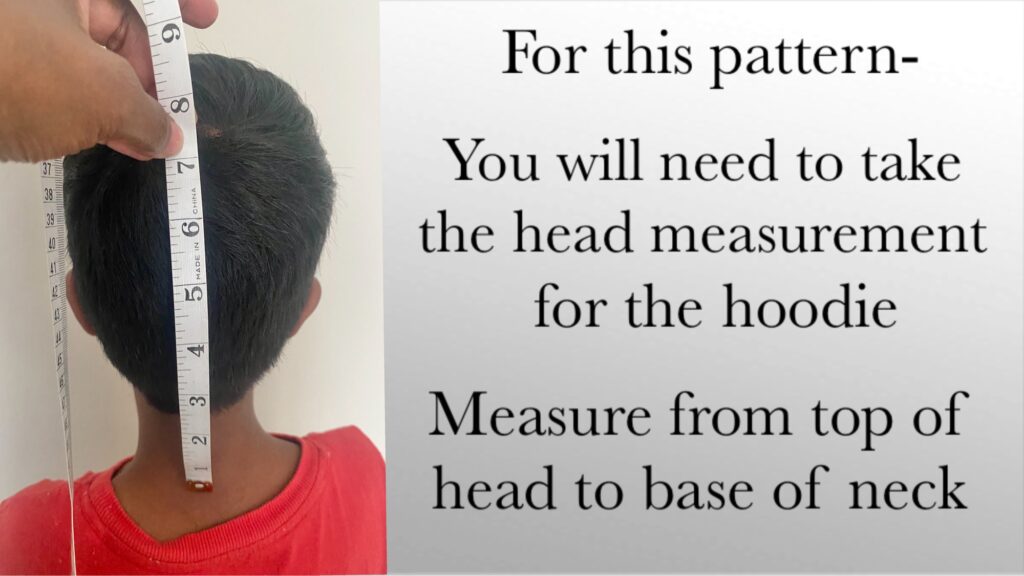
- Hoodie Measurement
This measurement is needed to determine the height of the hoodie in order for the hoodie to fit the head and is taken by measuring from the base of the neck to the top (crown)of the head.
Materials
- Yarn/wool
Aran/ catergory4/ worsted weight
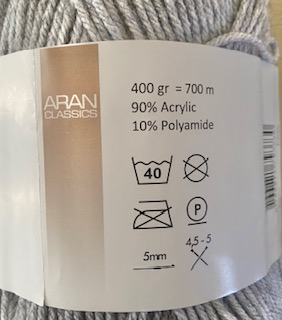
- Crochet hooks
5mm for ribbings
6mm for panels/hoodie and pocket
- Scissors
- Stitch markers
- Measuring tape
- Yarn/wool needle
Video Tutorial
Check out the video tutorial here
Gauge
Gauge/ Swatch is unimportant. You will be working this pattern according to body measurements.
Stitches and Abbreviations
ch/ch’s = chain/s
st/st’s = stitch/es
R = Round
hdc = half double crochet
sc = single crochet
sl st = slip stitch
sk = skip
decr = decrease
incr = increase with half double crochet
decr(sc) = decrease with single crochet
yo = yarn over
SM – Stitch marker
blo = back loops only
CF = Centre Front
CB = Centre Back
RS = Right Side
WS = Wrong Side
ch2, at the start of every Round counts as a st (hdc), therefor do not work the first hdc into the same st as ch2 and also remember to work the last st into the 2nd ch from ch2
To decrease using hdc (decr) = yo, insert the hook into the first st, pull up a loop, insert the hook into the next st, pull up a loop, yo, go through 4 loops on the hook – see Stitches and Abbreviations
To decrease using sc (decr(sc)) = insert the hook into the first st, pull up a loop, insert the hook into the next st, pull up a loop, yo, go through 3 loops on the hook – see Stitches and Abbreviations
To increase (incr) means working 2 st’s into 1 st
Note: You will be using half double crochets throughout the pattern except for certain parts of the hoodie: to create the round of the hoodie and for the ribbing around the hoodie
Pattern
Back Panel
Ribbing
Child sizes ch9
Adult sizes ch11
R1
Into the 3rd ch from the hook – hdc, hdc all ch’s (child 8st’s, adult 10st’s)
R2
ch2, turn, hdc all st’s (blo)
R3 to required length* – Repeat R2
*Required length is the when the length of the Ribbing measures the Shoulder to Shoulder measurement plus 2″or 5cm
SHOULDER TO SHOULDER MEASUREMENTS
CHILD SIZES
2years 9,5″ or 23,5cm
4years 10″ or 25cm
6years 10,5″ or 26cm
8years 11″ or 27cm
10years 11,5″ or 28,5cm
12years 12″ or 30,5cm
14years 12,5″ or 31cm
WOMEN SIZES
XS 14,5″ or 37cm.
S 15″ or 38cm
M 16″ or 40,5cm
L 17″ or 43cm
XL 17,5″ or 44,5cm
2XL 18″ or 45,5cm
3XL 18″ or 45,5cm
4XL 18,5″ or 47cm
5XL 18,5″ or 47cm
MEN SIZES
S 16″ or 40,5cm
M 17″ or 43cm
L 18″ or 45,5cm
XL 18,5″ or 47cm
2XL 20″ or 51cm
3XL 21″ or 53cm
4XL 21,5″ or 54,5cm
5XL 22,5″ or 57cm
Back Panel
Continuing along the top edge of the ribbing
R1
ch2, hdc all across the ribbing – work 3 st’s into every two Rounds of ribbing
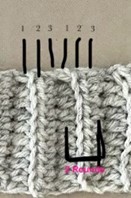
R2
ch2, turn, hdc all st’s
R3 to required length* – repeat R2
*Required length is when the back panel measures the physical measurement taken for the actual length of the sweater
Fasten off and cut off excess yarn
Note – we will use the back panel as a guide when working the front panel
Mark off Shoulders on the Back Panel
- Measure along top edge of Back panel for Shoulder (1) using the physical shoulder measurement taken – Mark off. Count the number of stitches and use this number to mark of Shoulder (2) on the Back panel.
- Note: these two SM’s will also be used to indicate the 2 corners of the hoodie – Do not remove these two SM’s until R1 of the Hoodie has been worked
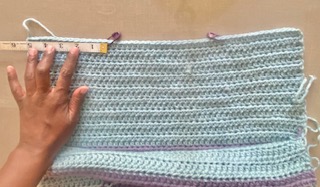
Front Panel
Repeat as for Back Panel – Work Front panel (Child 4, Adult 6) Rounds shorter that the Back Panel
Neckline (CF) Front Panel
Find CF by folding along the top edge of the Front Panel – fold in half – mark off fold with a SM to indicate CF. Count 2 st’s on either side of CF and mark off. Remove SM at CF. From SM1 to SM2 = 5st’s
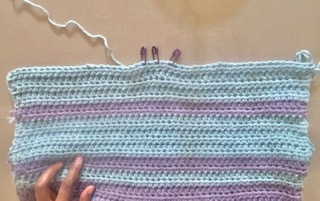
Continuing from front panel, work to SM1
ch2, turn. hdc all st’s to SM
R1 – R4 for Child sizes
R1 – R6 for Adult sizes
Fasten off cut and cut off excess yarn
Front Shoulder (2)
Attach yarn to SM2 at Shoulder 2 – Repeat as for Shoulder (1)
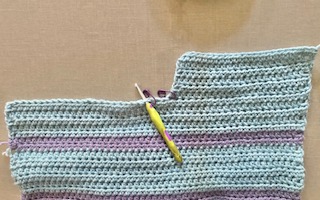
Fasten off and cut off excess yarn
Join Shoulders Back and Front panels by seaming – match stitch for stitch – see image below: only seam from outer edge to SM on both sides for shoulders
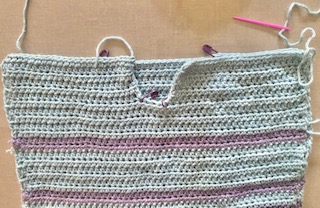
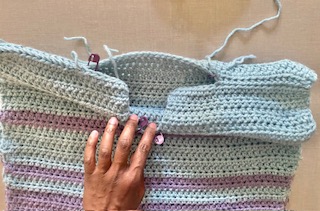
Mark off Armhole Depth – Sleeve openings
Along the length of the piece, measure the armhole depth for the size you are making from top edge (shoulder) going down – Mark off both layers, front and back. Do the same on the other side.
ARMHOLE DEPTH MEASUREMENTS
CHILD SIZES
2years 4″ or 10,5cm
4years 4,5″ or 12cm
6years 5″ or 12,5cm
8years 5,5″ or 14cm
10years 6″ or 15,5cm
12 years 6,5″ or 16,5cm
14years 7″ or 17,5cm
WOMEN SIZES
XS 6,5″ or 16,5cm
S 7″ or 17,5cm
M 7,5″ or 19cm
L 8″ or 20,5cm
XL 8,5″ or 21,5cm
2XL 9″ or 23cm
3XL 9,5″ or 24cm
4XL 10″ or 25,5cm
5XL 10,5″ or 26,5cm
MEN SIZES
S 9″ or 23cm
M 9,5″ or 24cm
L 10″ or 25,5cm
XL 10,5″ or 26cm
2XL 11″ or 28cm
3XL 11,5″ or 29cm
4XL 12″ or 30,5cm
5XL 12,5″ or 32cm
Seam to join back and front panels at the sides from SM marking off armhole depth to end of ribbing
Hoodie
Attach yarn to neckline – top edge on one side
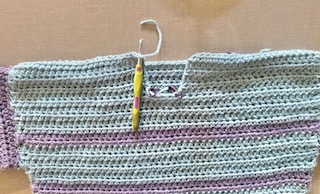
R1
ch2, hdc all around the neckline – work 1 incr into corner 1 and 1 incr into corner 2
R2 – to required length*
ch2, turn, hdc all st’s
*Required length is when the hoodie measures the physical measurement taken for the actual height of the head. This measurement is taken from the base of the neck to the top (crown) of the head.
Rounding off the hoodie
Fold along the top edge of the hoodie to find CB – Mark off
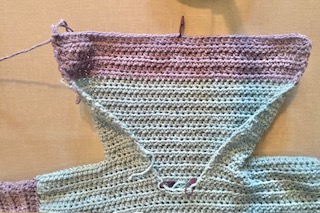
Next 4 to 6 Rounds for Children and 6 to 8 Rounds for Adults:
ch2, turn hdc to 2 st’s before CB, decr(sc), sc into CB (replace SM), decr(sc), hdc to end
Fasten off and cut off excess yarn leaving a long enough tail to help seam up and close the top edge of the hoodie
Edging/ Ribbing around the hoodie – Attach yarn to the bottom (at CF) of the front opening of the hoodie – ch5
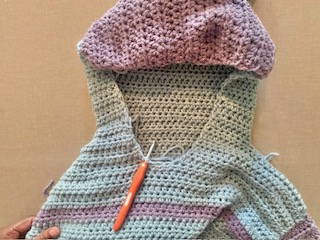
R1
Into the 2nd ch from the hook – sc, sc all ch’s (4st’s)
R2
sl st x 2 into hoodie, sc all st’s (blo) (4st’s)
R3 to end (opposite side of hoodie opening) – Repeat R2
Fasten off and cut off excess yarn
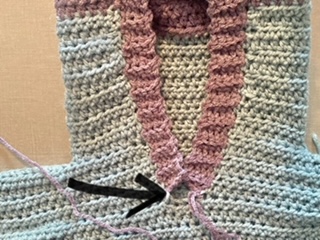
Seam along the bottom edges to join to neckline at CF
Sleeve x 2
Ribbing
Child ch9
Adult ch11
R1
Into the 3rd ch from the hook – hdc, hdc all ch’s (child 8st’s, adult 10st’s)
R2
ch2, turn, hdc all st’s (blo)
R3 to required length* – Repeat R2
*Required length is the when the Ribbing when folded around the physical wrist, fits well
Sleeve
Continuing along the top edge of the ribbing
R1
ch2, hdc all across the ribbing – work 3 st’s into every two Rounds of ribbing
R2
ch2, turn, hdc into same st as ch2 (counts as first incr), hdc all st’s, inc into last st
R3
ch2, turn. hdc all st’s
R4
ch2 turn, hdc all st’s
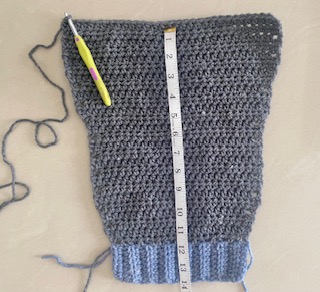
Repeat R2 to R4 until the width of the top edge of the sleeve measures twice the armhole depth for the size you are working – see image below: sleeve width measuring 12″ for a 10 year old
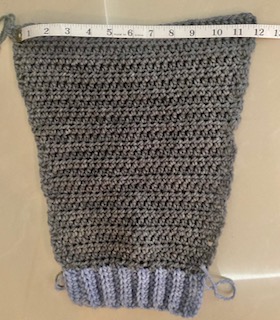
Thereafter repeat R4 until the sleeve length measures the arm length measurement for the size you are working – see image below showing sleeve length for a 10 year old
SLEEVE LENGTH MEASUREMENTS
CHILD SIZES
2years 8,5″ or 21,5cm
4years 10,5″ or 26,5cm
6years 11,5″ or 29cm
8years 12,5″ or 31,5cm
10years 13,5″ or 34,5cm
12years 15″ or 38cm
14years 16″ or 40,5cm
WOMEN SIZES
XS 16,5″ or 42cm
S 17″ or 43cm
M 17″ or 43cm
L 17,5″ or 44,5cm
XL 17,5″ or 44,5cm
2XL 18″ or 45,5cm
3XL 18″ or 45,5cm
4XL 18,5″ or 47cm
5XL 18,5″ or 47cm
MEN SIZES
S 18″ or 45,5cm
M 18,5″ or 47cm
L 19,5″ or 49,5cm
XL 20″ or 50,5cm
2XL 20,5″ or 52cm
3XL 20,5″ or 52cm
4XL 21″ or 49,5cm
5XL 21,5″ or 54,5cm
Fasten off and cut off excess yarn
Seam to join edges lengthwise along sleeve
Fit sleeve into armhole space with the body WS facing out and the sleeve RS facing out. Place the sleeve into the armhole space aligning the top of the sleeve to the armhole space – Seam to join
Repeat for other sleeve
Placement of pocket – Along the bottom edge of the Front (above the ribbing) mark of 3″or 7,5cm on either side – see image below
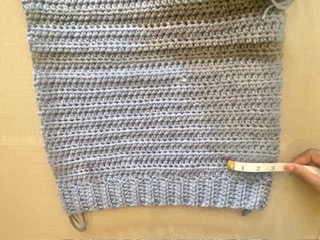
Attach yarn to the post of the stitch at first SM – We will be working stitches into the posts of these stitches from SM to SM
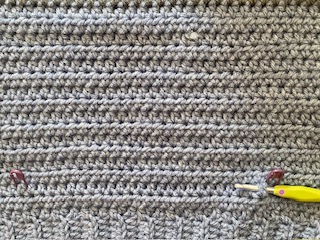
R1
ch2. hdc to SM2
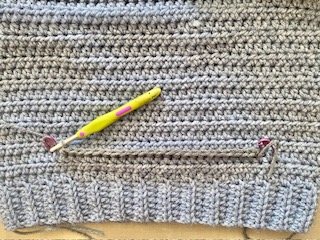
R2
ch2, turn, hdc into same st as ch2 (counts as first incr), hdc to last st, incr into last st
Child sizes R3/ Adult sizes R3, R4, R5
Repeat R2 once more for child sizes and three more times for adult sizes
Child sizes R4/ Adult sizes R6
ch2, turn decr, decr, hdc to 4 st’s before end, decr, decr
Child sizes R5/ Adult sizes R7
ch2, turn, decr, hdc to 2 st’s before end, decr
Child sizes R6/ Adult sizes R8
ch2, turn, hdc all st’s
Child sizes R7 – R11 – Repeat R6
Adult sizes R9 to R13 – Repeat R6
Note: You may work more Rounds to increase the height of the pocket
Fasten off and cut of excess yarn. Seam the top edge of pocket to the front panel to join
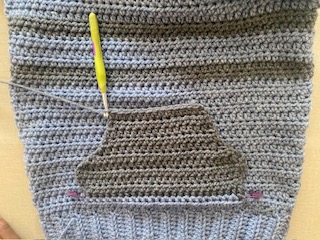
Seam along the sides at the bottom of the pocket to join to front panel
Weave in all ends to complete.
And that does it! I’m hoping that this was an enjoyable project and for all the beginners out there, it was an easy to follow pattern. Please do let me know in the comments below🤍
