“Milli the pede”
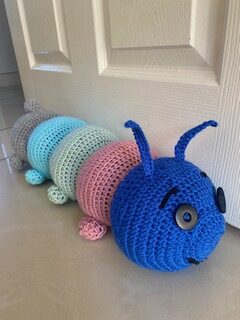
Every once in a while I like fun projects. This was one of those fun projects b…u…t, I did make it practical too, by turning it into a doorstop. Doorstop…plushie… whatever you fancy, it’s all in the way you stuff it. Use scrap yarn and fabrics to go the doorstop way or use lightweight stuffing for a plushie.
Pattern Notes
- This pattern makes use of US crochet terminology.
- Milli the pede- measures 19inches or 48cm in length
- This pattern is worked in 7 parts: (A) Head (B) Body 1 (C) Body 2 (D) Body 3 (E) Body 4 (F) Feet x 8 and tail (G) Antennae/ Feelers and Facial Features
- For this pattern, I used 100% Acrylic – Double Knit/ Light worsted/ category 3 yarn however cotton yarns in the same weight may also be used.
- This is an easy pattern. Stitches you need to be familiar with to work this pattern are Half Double Crochet (hdc) and slip stitch (sl st), Single crochet (sc) in addition there are increases and decreases.
- ch1 does not counts as a stitch
- Stuff with selected stuffing (see Materials) as you work the pattern
- Ensure that all tail ends are pushed to the wrong side/ inside
- Keep your stitches tight when working this pattern
Video Tutorial
Use the following link to access the tutorial
Materials
Materials needed for Milli the pede
- Yarn/ wool 100% Acrylic OR Cotton light worsted/ category 3/ Double Knit – approx. 250g (approx.50g per part)
- 3mm crochet hook for most of the pattern
- 4mm crochet hook for the feet and tail
- Scissors
- Yarn/Wool needle
- Buttons for the eyes
- Black yarn for the eyebrows and mouth
- Stuffing – You will need scrap fabrics, yarn bits, old crochet swatches, etc for a doorstop/ You will need lightweight stuffing for a plushie
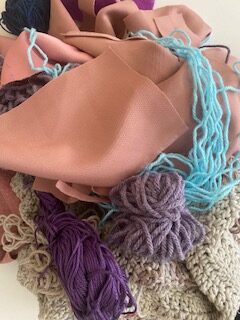
Scrap fabric and yarn used for the stuffing
Stitches and Abbreviations
Ch / ch = chain
st/’s = stitch/es
sl st = slip stitch
hdc = half double crochet
sc = single crochet
sk = skip
yo = yarn over
R = Round
decr = decrease
incr = increase
sl st = slip stitch
CF = Centre Front
CB = Centre Back
Increase (2hdc)
Work 2 hdc’s into one st
Decrease (decr)
yo, insert the hook into the st, pull up a loop, insert the hook into the next st, pull up a loop, yo, go through all 4 loops on the hook
Pattern
- Head (using the 3mm hook)
Form a magic Ring – See video tutorial if you are unsure how to
R1
Ch1, hdc 14 into ring – tighten ring, sl st to join (14st’s)
R2
Ch1, 2hdc into every st, sl st to join (28st’s)
R3 – R5
Ch1, hdc all st’s, sl st to join (28st’s)
R6
ch1, 2hdc into every st, sl st to join (56 st’s)
R7 – R9
ch1, hdc all st’s, sl st to join (56 st’s)
R10
Ch1, *hdc, 2hdc*
Repeat from *to* to end, sl st to join (83st’s)
R11 – R12
ch1, hdc all st’s, sl st to join (83 st’s)
R13
Ch1, *hdc, decr*
Repeat from *to* to end, sl st to join (56st’s)
R14 – R16
Ch1, hdc all st’s, sl st to join (56st’s)
R17
Ch1, *hdc, decr*
Repeat from *to* to end, sl st to join (38st’s)
Fasten off, cut off excess yarn. Attach yarn colour 2 – knot to secure
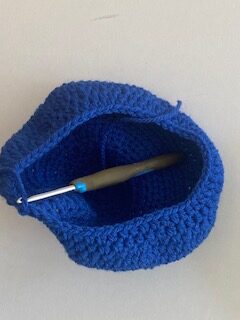
Image of the completed Head
- Body 1 (using the 3mm hook)
R1
Ch1, *hdc, decr*
Repeat from *to* to end, sl st to join (28st’s)
R2
Ch1, 2hdc into every st, sl st to join (56st’s)
R3 – R13 (11 Rounds)
Repeat R7 to R17 as for the Head
Fasten off, cut off excess yarn. Attach yarn colour 3 – knot to secure
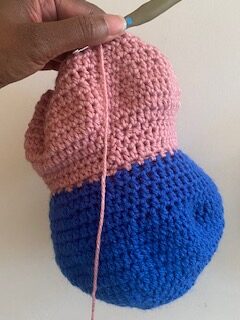
Image of Head and Body 1 complete
- Body 2 (using the 3mm hook)
- Body 3 (using the 3mm hook)
- Body 4 (using the 3mm hook)
Repeat as for Body 1 – Change yarn colours after each part
Continuing from Body 4
Make sure that the head and body are stuffed fully
Repeat R13 3 more times to close up on Body 4
Fasten off, leaving a long enough tail to seam up the opening
- Feet x 8/ Tail x 1 (using the 4mm hook)
Form a Magic Ring
R1
Ch1, hdc 6, tighten ring, sl st to join (6st’s)
R2
Ch1, 2hdc into each st, sl st to join (12st’s)
R3 – R4
Ch1, hdc all st’s, sl st to join (12st’s)
Fasten off, leaving a long tail to stitch the foot into place on the body. Stuff and stitch into place
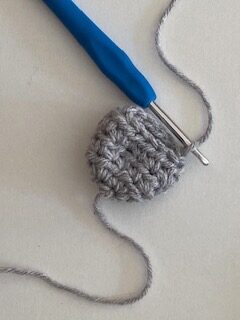
Image of the completed foot
Repeat for 7 more feet and 1 tail – stuff and stitch into place
- Facial Features
Sew on buttons for the eyes
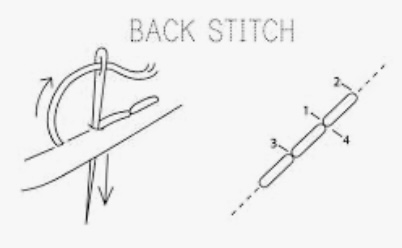
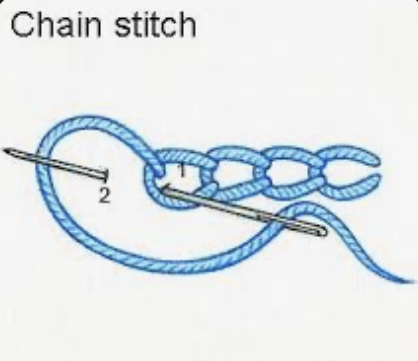
Stitch on the eyebrows and mouth using black yarn and a yarn/wool needle – using the backstitch and chain stitch
Antennae/Feelers x 2 (using the 3mm hook)
Ch15
R1
Into the 2nd ch from the hook – sc, sc all ch’s
Attach this onto the head by stitching
Weave in all ends to complete
