Crochet Cardigan KK
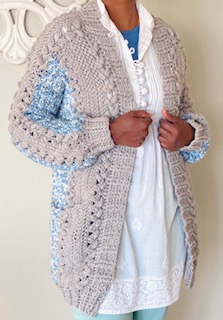
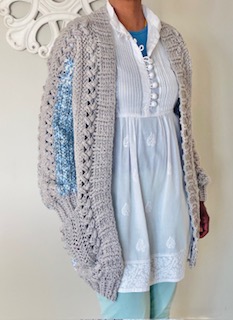
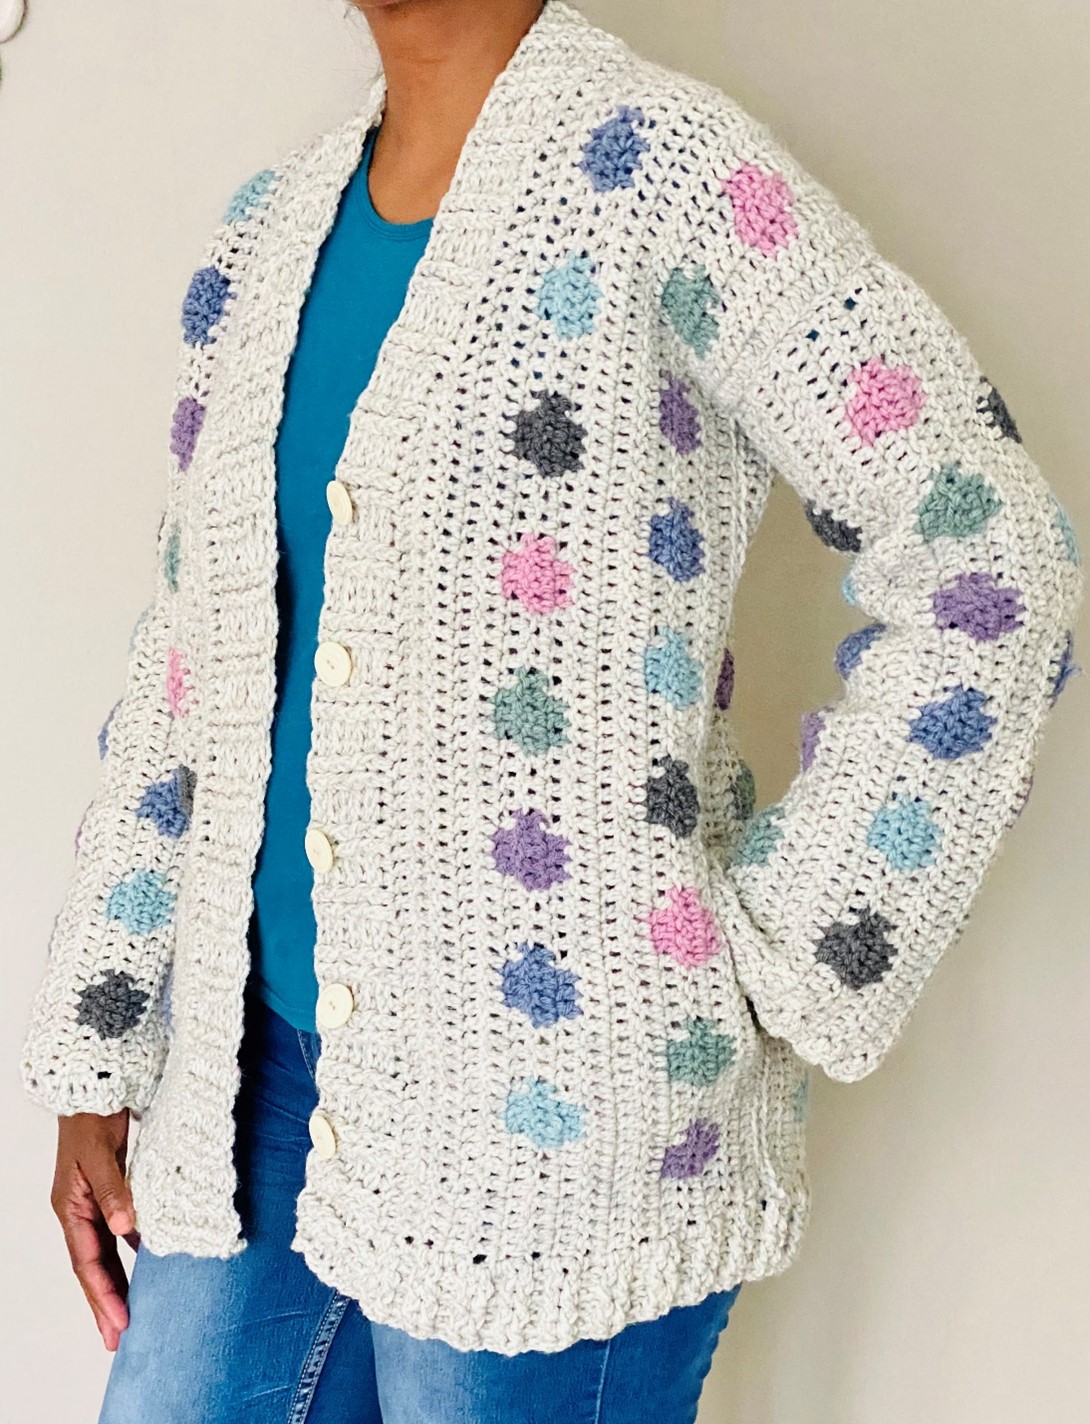
Okay, so if you haven’t seen it as yet, I’ve got a matching sweater to this cardigan… matching because I used the same pattern. First came the sweater, then came the cardigan! Puff stitches are one of my faves and I loved pairing it with Herringbone double crochets. I used a category 3, which is also known as a light worsted or more so known as Double Knit yarn. I went for contrast with a multitone and then I found a solid color that was also visible in the multitone so that it all looked like it belonged! I suggest using two colors for this pattern so that one may stand out.
Pattern Notes
Pattern Notes
- This cardigan is made using one’s own body measurements – Standard Measurements for the various sizes are provided for in the pattern, however, should you wish to take your own measurements, by all means do so. You will need to take 1 measurement for the length of the sweater as required
- This pattern makes use of US crochet terminology
- Measurements are in inches and centimetres (cm)
- This pattern is for sizes:
- Child 2yrs to 10yrs
- Youth 12yrs to 14yrs
- Adult XS to 5XL
- This pattern is worked in panels: Back panel, Front panel x 2, Sleeves x 2 Pocket x 2. The Ribbings are worked directly onto front opening, bottom and sleeves
- ch2 counts as a stitch
- Preferably use 2 different colours for this cardigan in order to pick up/bring out on the stitch detail of this pattern
Special Stitches
- Foundation Double Crochet
ch2, into the first ch – yo, insert the hook into that ch, pull up a loop (you now have 3 loops on the hook), yo, go through 1 loop on the hook creating a chain (take note of this chain that’s formed – it will be the start of the next st), yo, go through 2 loops on the hook, yo, go through 2 loops on the hook (stitch 1 is now complete), *yo, insert the hook into the chain (go through both loops on this chain), pull up a loop (you now have 3 loops on the hook) yo, go through 1 loop on the hook, (take note of this chain that’s formed – it will be the start of the next st) yo, go through 2 loops on the hook, yo, go through 2 loops on the hook* (stitch 2 is now complete)…. Repeat from *to* to complete foundation round
- Herringbone Double Crochet (H(dc))
yo, insert hook into stitch, pull up a loop – take the same loop and pull through the first loop on the hook, yo, pull up a loop, go through 1 loop on the hook, yo, pull up a loop, go through 2 loops on the hook
- Puff Stitch (Puff)
yo, insert hook into stitch, pull up a loop – elongate the loop slightly, *yo, insert the hook into the same stitch, pull up a loop – elongate the loop* Repeat from *to* two more times, yo, go through all loops an the hook, ch1 to secure
- Front Post Double Crochet (fpdc)
yo, insert hook into the post of the stitch (going from the front of the post), pull up a loop, yo, go through 2 loops on the hook, yo, go through 2 loops on the hook
- Back Post Double Crochet (bpdc)
yo, insert hook into the post of the stitch (going from the back of the post), pull up a loop, yo, go through 2 loops on the hook, yo, go through 2 loops on the hook
Video Tutorial
Need help with the pattern, check out
Stitches and Abbreviations
ch/ ch’s = chain/s
st/ st’s = stitch/ stitches
dc = double crochet
(H)dc = Herringbone double crochet
Puff Stitch = Puff
dc-puff = means work a dc and then work the puff into the skipped st (that is behind the dc)
2dc = means work a dc into each of the next 2 st’s
sk = skip
sk2 = means skip 2 st’s
sl st = slip stitch
sp/s = space/es
sp2 = means leave a space the width of 2 stitches
WS = Wrong side
RS = Right Side
R = Round
SM = Stitch marker
yo = yarn over
CF = centre front
CB = centre back
Materials
Yarn/ wool – 100% Acrylic Double Knit/ category 3/ light worsted (I used approx. 560g for a size Small – also depending on the length)
4mm crochet hook for the ribbings
5mm hook for the rest of the sweater
Scissors
Stitch markers
Measuring tape
Yarn/ wool needle
PATTERN
Back Panel – using the 5mm hook and Yarn colour (1)
R1
Work a Foundation Double Crochet (See Special Stitches) that when measured against the physical body, measures from shoulder to the hip or shorter/ longer as required

Note: Jot down the number of st’s as you will need this number for the Front Panels
R2
ch2, turn, H(dc) all st’s
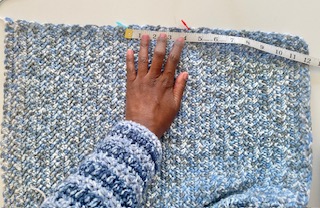
Repeat R2 until the width of the back panel measures the shoulder to shoulder measurement for the size you are making plus 3”or 7,5cm
Shoulder to shoulder measurements
CHILD SIZES
2years 9,5″ or 23,5cm
4years 10″ or 25cm
6years 10,5″ or 26cm
8years 11″ or 27cm
10years 11,5″ or 28,5cm
YOUTH SIZES
12years 12″ or 30,5cm
14years 12,5″ or 31cm
WOMEN SIZES
XS 14,5″ or 37cm
S 15″ or 38cm
M 16″ or 40,5cm
L 17″ or 43cm
XL 17,5″ or 44,5cm
2XL 18″ or 45,5cm
3XL 18″ or 45,5cm
4XL 18,5″ or 47cm
5XL 18,5″ or 47cm
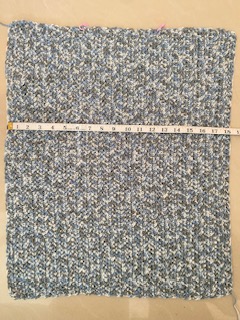
Mark off the neckline – Fold the back panel in half along the length of the panel – Measure half the neckline measurement (listed below) and mark off both layers
Half Neckline Measurements:
Child 1,5” or 4cm
Youth 2” or 5cm
Adult 2” or 5cm
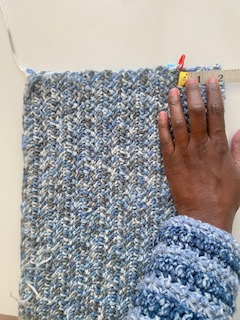
– once the panel is opened, the neckline must measure the full neckline measurement as listed below
Full Neckline Measurements
Child 3” or 8cm
Youth 4” or 10cm
Adult 4” or 10cm
Back Shoulder (1) – Using Yarn colour (2)
– Attach yarn to top edge of back panel (Note: there are no st’s to work into therefor work your st’s evenly across)
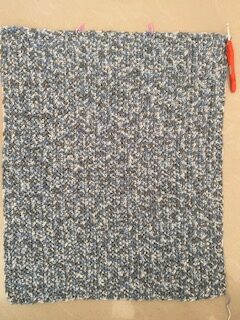
R1
ch2, dc, *sp2, dc-puff*
Repeat from *to* ending with 2dc (stopping at SM1)
R2
ch2, turn, dc, *sk2, dc-puff*
Repeat from *to* ending with 2dc
Fasten off, cut off excess yarn
Back Shoulder (2) – Using Yarn colour (2)
– Attach yarn to top edge of back panel at SM2
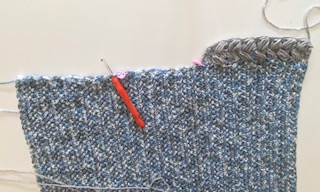
Repeat as for Back Shoulder (1)
Fasten off, cut off excess yarn
Set aside – We will use the Back Panel as a guide when working the Front Panel
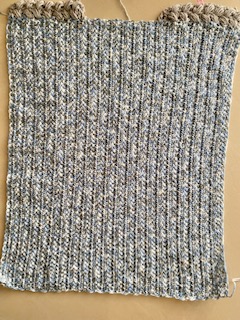
Front Panel (Side 1)
Using the 5mm and Yarn colour 1
R1
Work a Foundation Double Crochet (See Special Stitches) that is 3 stitches less than that of the Back Panel
R2
ch2, turn, H(dc) all st’s
Repeat R2 until the width of the Front panel measures approx. Adult/Youth 3” or 7,5cm/ Child 2” or 5cm (you may adjust this to your liking)
Fasten off, cut off excess yarn
Attach yarn colour 2 to the Side (1) panel – bottom edge
R1
ch2, dc, *sk2, dc-puff*
Repeat from *to* ending with a dc or 2
R2
ch2, turn, dc, *sk2, dc-puff*
Repeat from *to* ending with a dc or 2
R3
ch2, turn, H(dc) all st’s
Repeat R3 until the width of the Front panel measures half the width of the back less a further 3,5” or 9cm for Adults/Youth and 3” or 7,5cm for Child
Last 2 Rounds for CF – Repeat R1 and R2
At this point the Front Panel measures the same width as the shoulder portion of the Back Panel – see image below
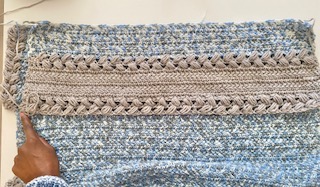
Fasten off, cut off excess yarn
Front Shoulder (1) – Using Yarn colour (2)
– Continuing along top edge of Front panel (Note: there are no st’s to work into therefor work your st’s evenly across)
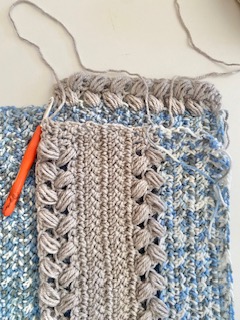
R1
ch2, dc, *sp2, dc-puff*
Repeat from *to* ending with 2dc (stopping at SM1)
R2
ch2, turn, dc, *sk2, dc-puff*
Repeat from *to* ending with 2dc
R3 – R4
ch2, turn, H(dc) all st’s
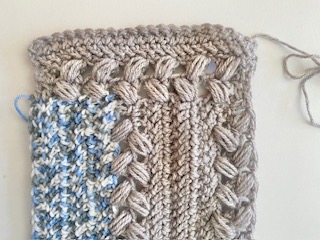
Fasten off, cut off excess yarn
Front Panel (Side 2) – Using the 5mm hook and Yarn colour (1)
Repeat as for Front Panel (Side 1) and Front Shoulder (1)
Assembly
Lay Front panels on top of the Back panel – Aligning well
Seam along shoulders to join
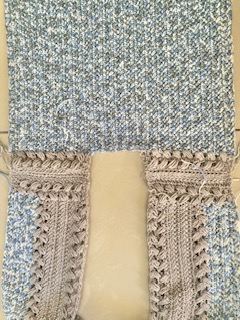
Mark off Armhole Depth by measuring from the Shoulder downwards on either side
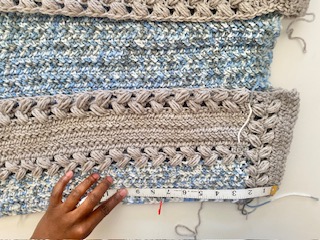
ARMHOLE DEPTH MEASUREMENTS
CHILD SIZES
2years 4″ or 10,5cm
4years 4,5″ or 12cm
6years 5″ or 12,5cm
8years 5,5″ or 14cm
10years 6″ or 15,5cm
YOUTH SIZES
12 years 6,5″ or 16,5cm
14years 7″ or 17,5cm
WOMEN SIZES
XS 6,5″ or 16,5cm
S 7″ or 17,5cm
M 7,5″ or 19cm
L 8″ or 20,5cm
XL 8,5″ or 21,5cm
2XL 9″ or 23cm
3XL 9,5″ or 24cm
4XL 10″ or 25,5cm
5XL 10,5″ or 26,5cm
Seam along the side from SM at armhole to bottom on either sides to join
Sleeve x 2 – using the 5mm hook
Chain a foundation chain that measures the sleeve length for the size you are making less 2” or 4cm
SLEEVE LENGTH MEASUREMENTS
CHILD SIZES
2 years 8,5” or 21,5cm
4 years 10,5” or 26,5cm
6 years or 11,5” or 29cm
8 years 12,5” or 31,5cm
10 years 13,5” or 34,5cm
YOUTH SIZES
12 years 15” or 38cm
14 years 16” or 40,5cm
ADULT SIZES
XS 16,5” or 42cm
S 17” or 43cm
M 17” or 43cm
L 17,5” or 44,5cm
XL 17,5” or 44,5cm
2XL 18″ or 45,5cm
3XL 18” or 45,5cm
4XL 18,5” or 47cm
5XL 18,5” or 47cm Work the sleeve as for the front panel working the puff stitch detail, 2 Rounds of H(dc) and puff stitch detail along the centre of the sleeve width using Yarn colour (2) – Work Rounds of H(dc) in Yarn colour (1) on either side – see image below – The width of the sleeve must measure twice the armhole depth for the size you are making
Seam the sides of the sleeve together to form a “cylinder” – repeat for other sleeve
Fit sleeve into armhole – aligning the puff stitch detail along the sleeve to the puff stitch detail along the shoulder – Seam to join
Repeat for other sleeve
For Ribbings, attach Yarn colour (2) to front opening along one side at the bottom edge, sleeves and bottom of sweater at one edge
Ribbings – using the 4mm hook and Yarn colour (2)
R1
ch2, dc all around, sl st to join
R2
ch2, *fpdc, fpdc, bpdc, bpdc*
Repeat from *to* to end, sl st to join
Note: the tighten up further on the sleeve ribbings, you may decrease st’s by working fpdc into 2 posts instead of 1 post – do this only as necessary to tighten up on the ribbing – work decreases only for R2
R3
ch2, *fpdc, fpdc, bpdc, bpdc*
Repeat from *to* to end, sl st to join
Note: work fpdc’s into fpdc’s and bpdc’s into bpdc’s
Repeat R3 – 5 more times or as required.
Pockets x 2
Decide on the placement of the pocket by fitting on the cardigan
Work the pocket to “blend into the cardigan” by following the change of colours and the puff stitch detail (when you seam the pockets into place it should “blend” into the cardigan
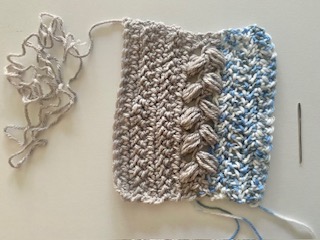
R1
Foundation dc – 20st’s (or as required)
R2 – R5
ch2, turn, (H)dc all st’s
change of colour
R6
ch2, dc, *sp2, dc-puff*
Repeat from *to* ending with 2dc (stopping at SM1)
R7
ch2, turn, dc, *sk2, dc-puff*
Repeat from *to* ending with 2dc
Change of colour
R8 – R12
ch2, turn, H(dc) all st’s
Fasten off, cut off excess yarn
Seam pockets into place
Fasten off, cut off excess yarn, weave in all ends to complete
