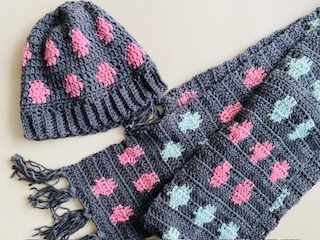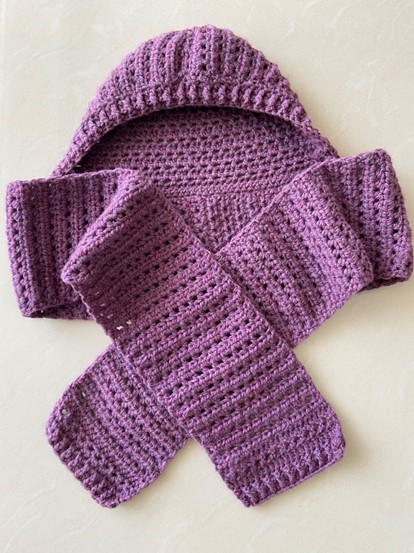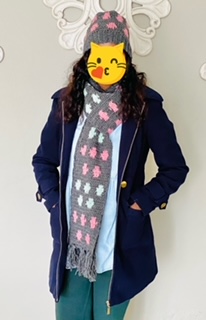
Naturally, I had to make a beanie to match my polka dot scarf. This is the second pattern from my “Polka Dot” range. This pattern has no specific sizes and is worked according to one’s own head measurements. It’s an easy pattern and together with the video tutorial makes it suitable for beginners.
Pattern Notes
- This pattern makes use of US crochet terminology
- Measurements are in inches and centimeters
- This pattern is worked in two parts: first the ribbing and then the body of the beanie
- I used a Double Knit/ light worsted category 3 yarn, however, a category 4 worsted weight yarn is totally acceptable. Please ensure that you use the same weight of yarn for the base colour as well as the Polka Dots. Use the recommended hooks as listed on the yarn label.
- dc2/ dc3/ dc5, etc means 2 or 3 or 5, etc double crochets worked in the same/ base colour yarn
- brackets indicate stitches to be worked in the change of colour example (dc3) – you will change the colour of the yarn to work the Polka Dot pattern which is indicated by ( ) working 3 dc’s
- ch3 counts as a stitch – double crochet
- Decide on your chosen colours ie, the base colour and the colours of the Polka Dots – The Polka Dots are indicated in brackets ( ) in the pattern – See the pattern Swatch on how to get the lengths of yarn needed for the Polka Dots
- Increase means working 2 stitches into 1 stitch
- Decrease means working 1 stitch into 2 stitches
- To decrease – yo, insert the hook into the stitch, pull up a loop, insert the hook into the next stitch, pull up a loop, yo, go through 3 loops on the hook, yo, go through 2 loops on the hook
Stitches and Abbreviations
ch/ ch’s = chain/s
st/ st’s = stitch/ stitches
sc/ sc’s = single crochet/ s
hdc = half double crochet
dc = double crochet
sk = skip
sl st = slip stitch
sp/s = space/es
WS = Wrong side
RS = Right Side
R = Round
blo = back loops only
yo = yarn over
Materials

Yarn/ wool Category 3/ light worsted weight/Double Knit (I used approx 100g)
Crochet hook 4mm
Scissors
Stitch markers
Measuring tape
Yarn/ wool needle
Video Tutorials
Check out my video tutorials
Check out https://youtu.be/EPTL7MaovA

Check out https://youtu.be/_9A4t89-DFM
Swatch
ch11
R1
Into the 4th st from the hook dc, dc all chs
R2
ch3, turn, dc3, (dc3), dc4
R3
ch3, turn, dc2, (dc5), dc3
R4
ch3, turn, dc3, (dc3), dc4
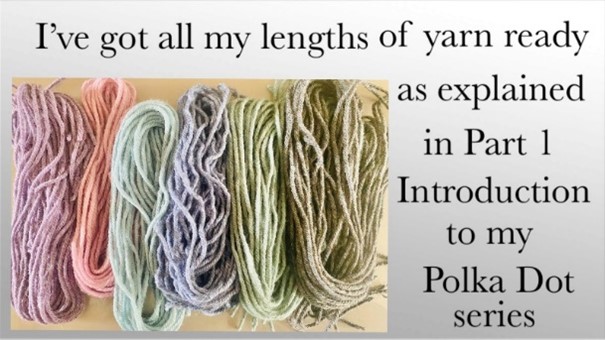
Open the swatch – take note of the length of yarn used for the change of colour (st’s in brackets), add on an 8”allowance. Now you have an idea of the lengths of yarn needed to form the Polka Dots
Tip: Prepare the lengths of yarn for the Polka Dots in advance
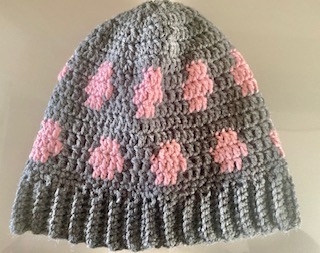
Pattern
Ribbing
ch9
R1
Into the 2nd ch from the hook – sc, sc all ch’s – 8st’s
R2
ch1, turn, sc all st’s (blo) – 8st’s
R3 to required length until ribbing fits around the head just as a beanie would – Repeat R2
Join ends of ribbing to form a band – seam ends together to join
Note: This band of ribbing must fit around the head
Body of the Beanie
Continuing from the ribbing – along the top edge
R1
ch1, sc all around the top edge of the ribbing, sl st to join
Note: there are no actual stitches to work into, work your stitches into the gaps or spaces along the ribbing rows
Count the number stitches from R1- adjust stitch count to a multiple of 8 in R2 – adjust by increasing in R2
R2
ch1, sc all st’s – increase to adjust stitch count to a multiple of 8, sl st to join
R3
ch3, dc2, (dc3), *dc5, (dc3)*
Repeat from *to* ending with dc3, sl st to join
R4
ch3, dc, (dc5), *dc3, (dc5)*
Repeat from *to* ending with dc2, sl st to join
R5
ch3, dc2, (dc3), *dc5, (dc3)*
Repeat from *to* ending with dc2, sl st to join
R6
ch3, dc all st’s in base color, sl st to join
R7
ch3, dc all st’s in base color, sl st to join
R8
Change color of yarn to start of with a polka dot
(ch3, dc), dc5, *(dc3), dc5*
Repeat from *to* ending with (dc) in the change of colour, sl st to join
R9
(ch3, dc2), dc3, *(dc5), dc3*
Repeat from *to* ending with (dc2) in the change of color, sl st to join
R10
(ch3, dc), dc5, *(dc3), dc5*
Repeat from *to* ending with (dc) in the change of color, sl st to join
Change color of yarn back to base color
Options: you may repeat R3 to R5 OR R3 to R10 to increase the length of the body of the beanie – work 2 Rounds of dc before repeating
The last 5 rounds are Decrease Rounds to taper off the top of the beanie
R11
ch3, dc all st’s – work 1 decrease into each of the sets of 5dc’s worked in the base color, sl st to join
R12 – R15
ch3, dc all st’s – work 1 decrease into each of the sets of dc’s worked in the base color (in line with the decrease from the previous round), sl st to join
Fasten off – cut off excess yarn leaving behind a long enough tail to help with the seaming/ gathering of the top end of the beanie
Seam the top end and gather to close
Weave in all the ends to complete.
