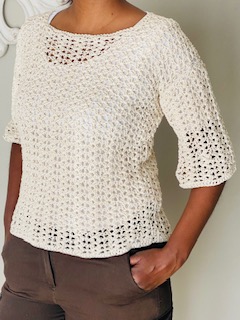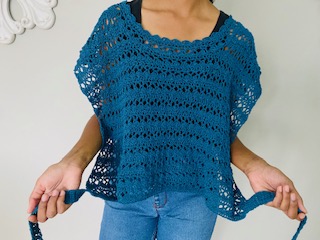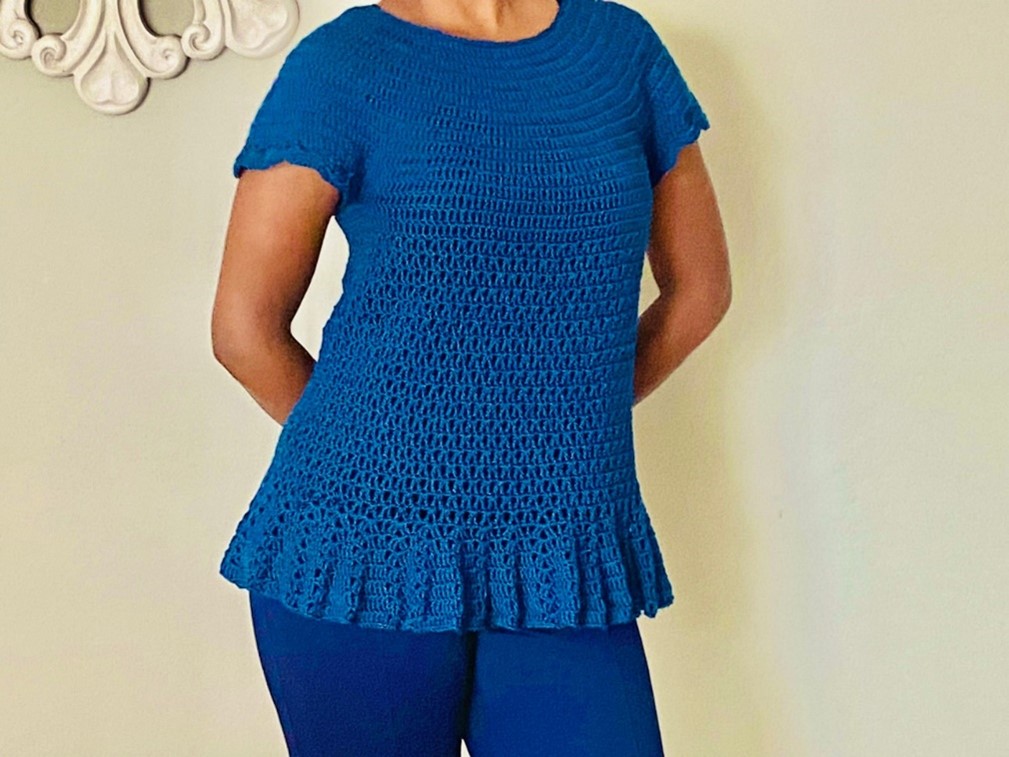
This I made especially for myself. I love longer Tops, and I guess that’s the reason behind the creation of this Top. It’s an easy pattern with an equally easy stitch pattern.
Pattern Notes
This pattern has no specific sizes – you will be working using your own body measurements. Pattern is for sizes:
- Child sizes – 2 years to 10 years
- Youth sizes – 12 years to 16 years
- Adult sizes – XS, S, M, L, XL, 2XL, 3XL, 4XL, 5XL
This pattern makes use of US crochet terminology
Measurements are in inches and centimetres
Increase = work 2 stitches into one stitch
ch4 counts as a stitch – triple crochet (tc)
ch5 counts as a triple crochet (tc) and ch1
ch3 counts as a double crochet (dc)
tc-ch1-tc means all into one stitch
tc2-ch2-tc2 means all into one stitch or chain space
dc3-ch2-dc3 means all into one stitch or chain space
For the Yoke, after every 2 Rounds of triple crochets, the next Round will be an increase Round – increase Rounds:
- R4 – increase after every 3rd st
- R7 – increase after every 4th st
- R10 – increase after every 5th st
- R13 – increase after every 6th st
- R16 – increase after every 7th st
And so on…
Stitches and Abbreviations
ch/ ch’s = chain/ s
R = Round
st/ st’s = stitch/ es
sc = single crochet
dc = double crochet
tc = triple crochet
tc2 = 2 triple crochets
sl st = slip stitch
sk = skip
sp = space
SM = stitch marker
Video Tutorial
Check out https://youtu.be/FpPGZ3p9n1Y
Materials
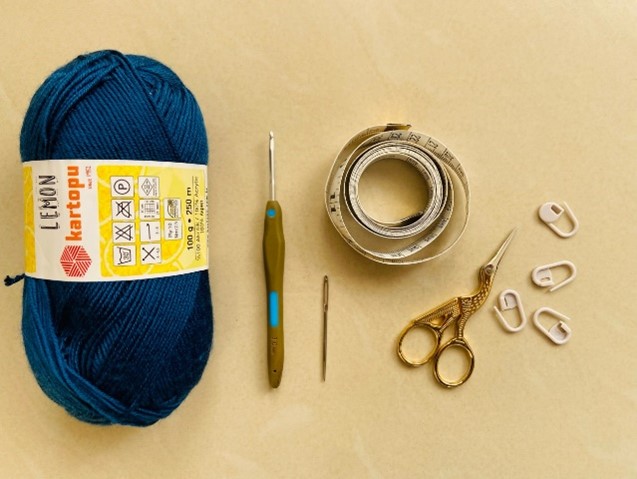
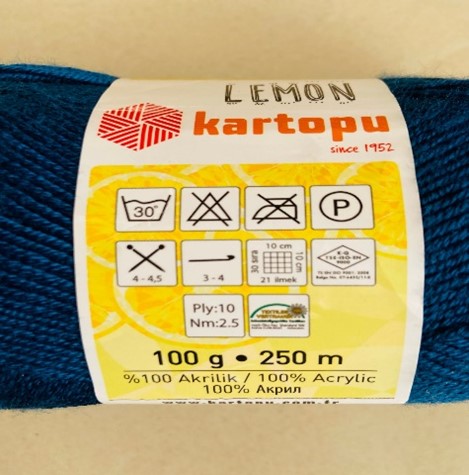
- Yarn/ wool – light/ fine Acrylic/ Cotton 4ply
- 3mm crochet hook
- Stitch markers
- Measuring tape
- Scissors
- Yarn/ wool needle
Crochet Weekend Top
Pattern
Foundation chain
Chain a length of ch’s – while holding both ends of the chain together, fit it over the head – when joined it must fit over the head and around the neck comfortably – not too tight
Join first to last ch with a sl st ensuring that the entire ch is not twisted
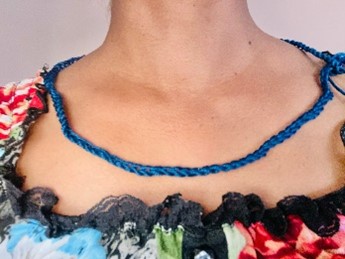
Image – This chain was 120 chains for a size Medium
Yoke
R1
ch1, sc into same st as ch1, sc all ch’s, sl st to join
R2
ch4 (counts as a tc), tc all st’s, sl st to join
R3
ch4 (counts as a tc), tc all st’s, sl st to join
R4 (increase R) – refer Pattern Notes
ch4 (counts as a tc), tc all st’s – incr after every 3rd st, sl st to join
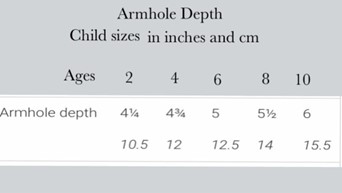
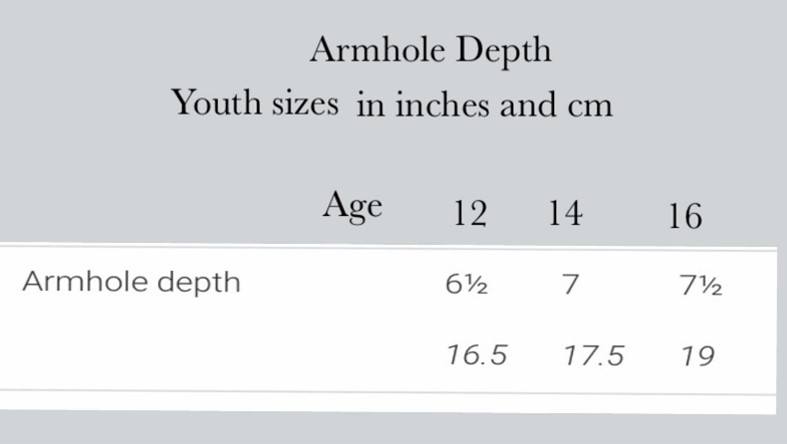
Repeat R2, R3 and R4 until the yoke measures the armhole depth for sizes:
NOTE: refer to Pattern Notes with regards to increase Rounds
CHILD SIZES –
YOUTH SIZES –
WOMEN SIZES –
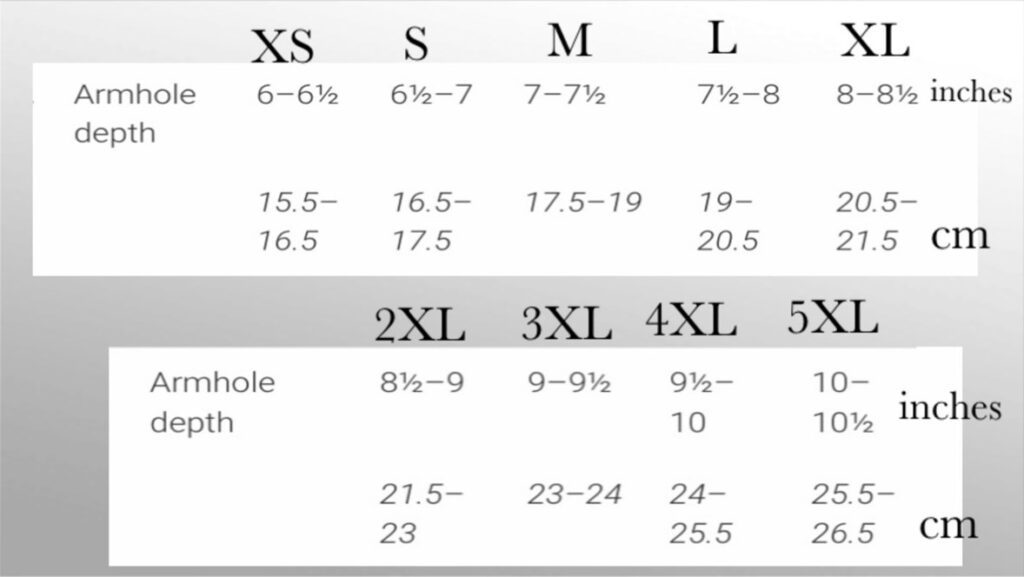
- Measurements in inches and centimetres
Or alternatively when the yoke, once fitted, aligns with the underarm
How to measure the armhole depth : with the yoke laid out flat – the back on top of the front (or vice versa) (the yoke will therefore be folded in half), measure straight from the neckline (along the centre of the yoke) to the bottom end of the yoke
Separation between back body, front body and armholes:
Count the number of stitches for the last Round of the Yoke
Divide that number by 4 (front body, back body, armhole space x 2) Any remaining stitches, add to the front body
Start counting from the start (ch4 will be the 1st st) and divide the Yoke by the 4 numbers that you calculated
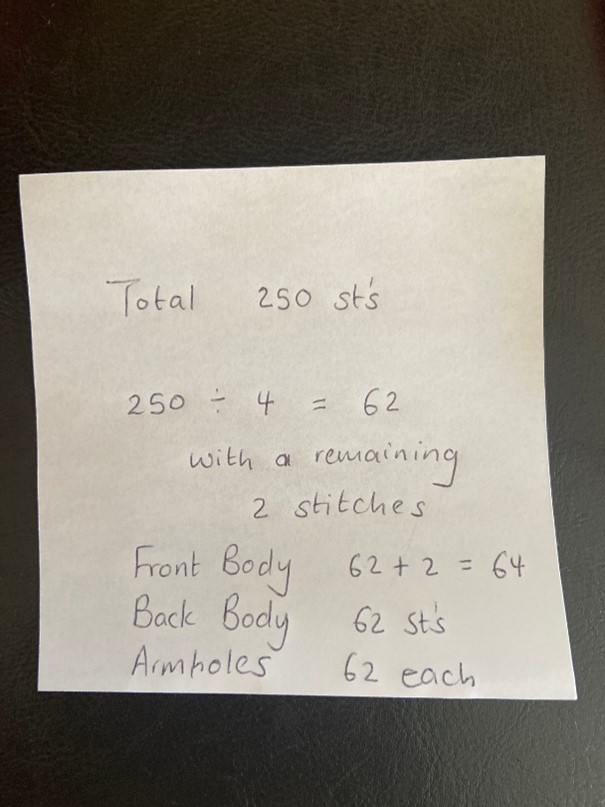
- An example – I counted from the start and marked off the 62nd st with SM1 (back), counted 62 again and marked off with SM2 (armhole 1), counted 64 st’s and marked off with SM3 (front) and marked off the last st with SM4 (armhole 2)
Body
R1
ch4, tc to SM1, tc into the st marked by SM1, ch7, tc into the st marked by SM2 (skipping st’s in between), tc to SM3, tc into the st marked by SM3, ch7, tc into the st marked by SM4 (skipping st’s in between), tc to end, sl st into the 4th ch from ch4 to join
R2
ch4, tc all st’s, tc all ch’s, sl st into the 4th ch from ch4 to join (count the number of stitches to adjust in R3)
R3
ch4, tc all st’s, sl st into the 4th ch from ch4 to join – adjust stitch count – stitch count must be in multiples of 2 – increase if necessary
R4
ch5, tc into the same stitch as ch5, *sk 1, tc-ch1-tc*
Repeat from *to* ending with sl st into the 4th ch from ch5 to join
R5
ch5, tc into the same stitch as ch5, *sk 2(skip the ch1 and tc), tc-ch1-tc*
Repeat from *to* ending with sl st into the 4th ch from ch5 to join
R6 to desired length- repeat R5
Bottom Edging – Ruffle
R1
sc into the first ch1 sp, ch4 into the same ch sp, *tc2-ch2-tc2 into the next ch1 sp, tc into the next ch1 sp*
Repeat from *to* ending with tc2-ch2-tc2 into the last ch1 sp, sl st into the 4th ch from ch4 to join
- Note: should you be unable to end with a tc2-ch2-tc2, work as follows:
When you get to the last ch1 sp – tc in between the last two ch1 spaces and tc2-ch2-tc2 into the last ch1 sp
R2
ch4, tc into same st as ch4, tc2-ch2-tc2 into ch2 sp, *tc2 into single tc, tc2-ch2-tc2 into ch2 sp*
Repeat from*to* sl st into ch4 to join
R3
ch4, tc2 into next tc, tc2-ch2-tc2 into ch2 sp, *tc into first tc, tc2 into 2nd tc, tc2-ch2-tc2 into ch2 sp*
Repeat from*to* sl st into ch4 to join
R4
ch4, tc into same st as ch4, tc into next tc, tc into next tc, tc2-ch2-tc2 into ch2 sp, *tc2 into first tc, tc into 2nd tc, tc into the 3rd tc, tc2-ch2-tc2 into ch2 sp*
Repeat from*to* sl st into ch4 to join
R5
ch4, tc into next tc, tc into next tc, tc2 into the next tc, tc2-ch2-tc2 into ch2 sp, *tc into first tc, tc into 2nd tc, tc into the 3rd tc, tc2 into the 4th tc, tc2-ch2-tc2 into ch2 sp*
Repeat from*to* sl st into ch4 to join
R6
ch4, tc into same st as ch4, tc into next tc, tc into next tc, tc into the next tc, tc into the next tc, tc2-ch2-tc2 into ch2 sp, *tc2 into first tc, tc into 2nd tc, tc into the 3rd tc, tc into the 4th tc, tc into the 5th tc, tc2-ch2-tc2 into ch2 sp*
Repeat from*to* sl st into ch4 to join
R7
ch4, tc into next tc, tc into next tc, tc into the next tc, tc into the next tc, tc2 into the next tc, tc2-ch2-tc2 into ch2 sp, *tc into first tc, tc into 2nd tc, tc into the 3rd tc, tc2 into the 4th tc, tc into the 5th tc, tc into the 6th tc, tc2-ch2-tc2 into ch2 sp*
Repeat from*to* sl st into ch4 to join
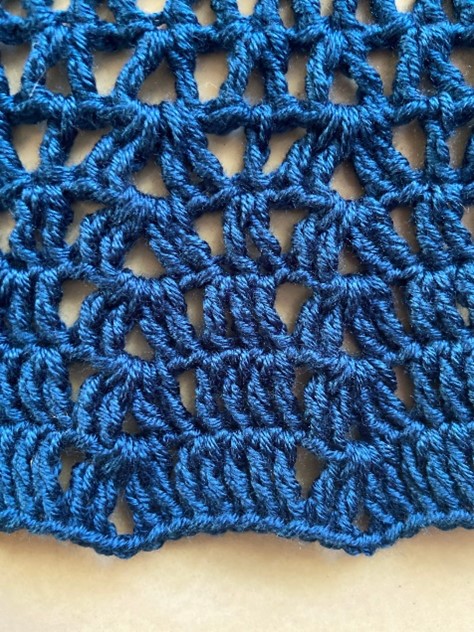
Image – Bottom Edging – Stitch pattern R1 to R5
Fasten off – cut off excess yarn
Sleeve Edging
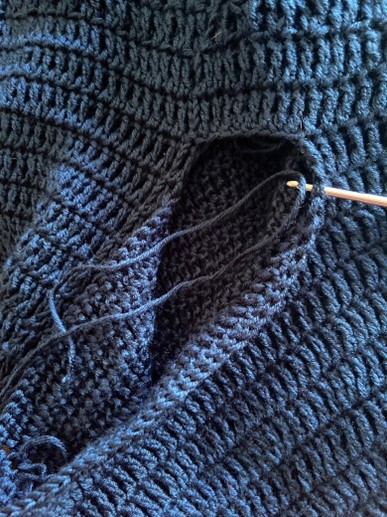
Attach yarn to the side of armhole space as shown in image – we will not work the sleeve on the underarm part of the armhole space
R1
ch5, tc into same st as ch5, *sk2, tc-ch1-tc*
Repeat from *to* to opposite side of armhole space
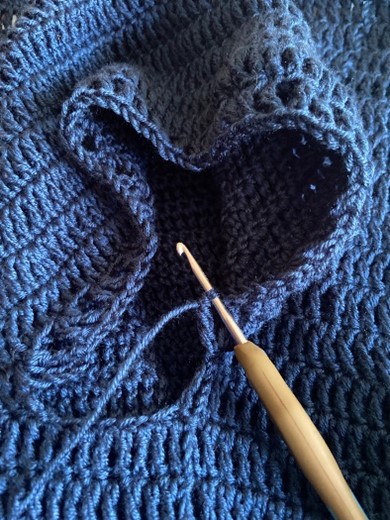
Notice that I haven’t worked the stitch pattern along the underarm of the armhole space
R2
turn, sc into the 1st ch1 sp, ch3 into the same ch1 sp, *dc3-ch2-dc3 into the next ch1 sp, dc into the next ch1 sp*
Repeat from *to* ending with a dc into the last ch1 sp
Fasten off – using a yarn needle, stitch the edges to secure the sides of the sleeve edging to the armhole space
Repeat for the other sleeve edging
Weave in all the ends. ALL DONE! Happy crocheting ☺️
