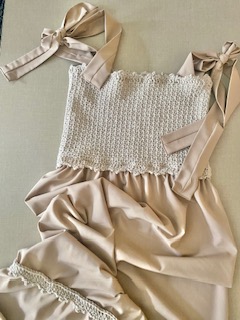
Omg! My stash of this particular category 4 yarn was humungous. Out of this stash, I made 2 gowns, one for my son and one for myself (you will find the patterns for these under the Crochet Essentials Category) and there was still yarn to spare. I used the same stitch pattern and created this throw with the leftover skeins of yarn. It was so easy and quick to make! I chose to make it small and use it as a throw. My daughter is always using it when lazing in front of the tv binge-watching all her favorites. Just goes to show, everybody needs a throw. You can adjust the foundation chain, making it as long or as short as you would like your throw/blanky to be.
Pattern Notes
- This pattern makes use of US Crochet Terminology
- The size of the Throw/Blanket is adjustable – Chain as many chains as need be for the required length – see Foundation Chain
- Stitch pattern is in multiples of 3
- ch3 counts as a stitch – double crochet (dc)
Stitches and Abbreviations
ch/ ch’s = chain/s
st/ st’s = stitch/ stitches
sc/ sc’s = single crochet/ s
dc/ dc’s = double crochet/ s
sk = skip
sl st = slip stitch
sp/s = space/es
blo = back loops only
R = Round
yo = yarn over
Puff St = Puff Stitch
PUFF STITCH (Puff st)… how to
yo, insert the hook into the last skipped st, pull up a loop – elongate the loop to about 1cm, yo, insert the hook into the same skipped st, pull up a loop – elongate the loop, yo, insert the hook into the same skipped st, pull up a loop – elongate the loop, yo, insert the hook into the same skipped st, pull up a loop – elongate the loop, yo, go through all the loops on the hook, ch1 to secure
Materials
- Yarn/ wool – category 4/ worsted/ Aran (quantity dependant on size)
- 6mm crochet hook
- Scissors
- Yarn/ wool needle
Video Tutorial
Check out https://youtu.be/XSHXMfndrTg
Crochet Throw/ Blanket “Winter Warmer”
Pattern
- Foundation Chain
Chain a length of chains (according to the length of Throw/ Blanket required) – Now, count the number of chains and adjust to a multiple of 3 + 1 (That means – stitch count in multiples of 3 and then add on 1 more ch)
- Throw/Blanket
R1 (work all stitches into the little “bump” at the back of the chain)
Into the 2nd ch from the hook – sc, sc all ch’s
R2
ch3, turn, dc all st’s (blo)
R3
ch1, turn, sc into same st as ch1 (blo), sc all st’s (blo)
R4
ch3, turn, dc all st’s
Repeat R3 and R4 to desired width of Throw/Blanket
Note – End on a R4 Repeat
Do not fasten off – continue to Edging
- Edging
-continuing from where you had stopped – at the last Round of Double Crochet
Side (1)
ch3, turn, sk 1, Puff st into skipped st, *sk2, dc, Puff st into the last skipped st*
Repeat from *to* to the end of Side (1)
Do not fasten off – Continue to Side (2)
Side (2) (turn the Throw/ Blanket)
ch2, turn to side (2), *dc into the sc “space”, Puff st into the “skipped” space* (see images below)
Repeat from *to* to the end of Side (2)
Do not fasten off – Continue to Side (3)
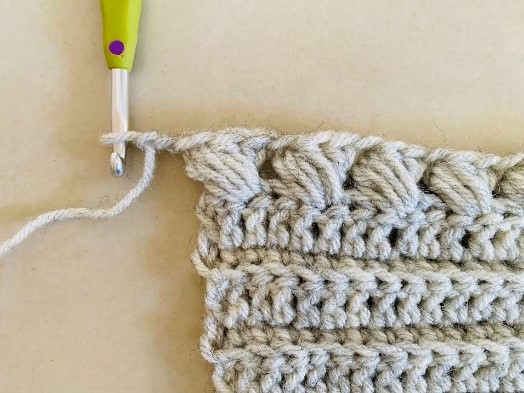
image showing ch2
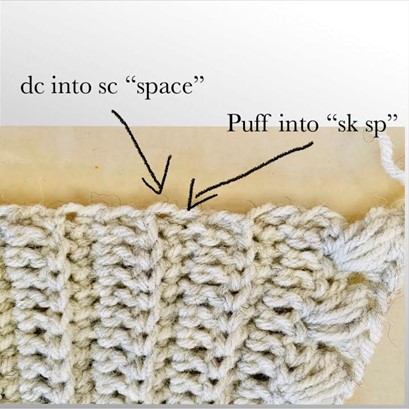
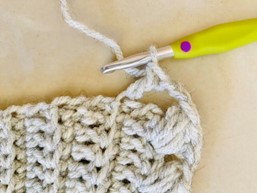
Image showing dc into sc “space”
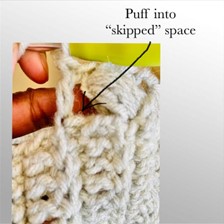
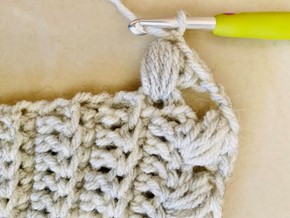
Images above showing Puff st into “sk sp”
Side (3) (turn the Throw/ Blanket)
ch2, turn to side (3), *sk2, Puff st into last skipped st*
Repeat from *to* to the end of Side (3)
Do not fasten off – Continue to Side (4)
Side (4) (turn the Throw/ Blanket)
ch2, turn to side (4), *dc into the sc “space”, Puff st into the “skipped” space*
Repeat from *to* to the end of Side (4) – ending with the last dc-puff into the last sc “space”, ch2, sl st into 3rd ch from ch3 to join
Fasten off – cut off excess yarn – weave in all the ends

