This slipper socks uses so little yarn, it’s unbelievable. I used less than one skein for a pair, and that was for myself. I love it because I’m always looking for projects that use up leftover yarn and this was one of them for me. I’ve made these slipper socks for my daughters and son and you can imagine, I used even less yarn for their little feet.
Pattern Notes
- The Crochet basic in-the-round Slippers Socks Pattern is for Teen/ Adult Sizes
- This pattern makes use of US crochet terminology.
- Measurements are in inches and centimetres.
- This pattern is worked in 4 parts: (1) Ribbing (2) Heel (3) Body (4) Toes
- Please Note that the ribbing is not worked in-the-round.
- As you go along, while working the sock, try fitting on the piece to ensure a good fit.
- This pattern was created with the intention of using leftover yarn – I used 100% Acrylic – Double Knit/ Light worsted/ category 3 yarn as I found it to be the most used yarn.
- This is an easy pattern. Stitches you need to be familiar with to work this pattern are Double Crochet (dc), Half Double Crochet (hdc) and Single Crochet (sc), in addition there are increases and decreases.
- ch3 counts as a stitch – double crochet (dc)
- ch2 counts as a stitch – half double crochet (hdc)
Video Tutorial
Use the following link on YouTube to access the tutorial –
Materials

- Yarn/ wool 100% Acrylic light worsted/ category 3/ Double Knit – approx. 60 to 70g
- 4mm crochet hook
- Stitch markers x 2
- Scissors
- Tapestry needle
Stitches and Abbreviations
Ch / ch = chain
st = stitch
sl st = slip stitch
dc / dc’s = double crochet / double crochets
sc = single crochet
hdc = half double crochet
blo = back loops only
sk = skip
yo = yarn over
R = Round
SM = stitch marker
decr = decrease
incr = increase
Increase (dc)
Work 2 dc’s into 1 st
Decrease (dc)
yo, insert the hook into the st, pull up a loop, insert the hook into the next st, pull up a loop, yo, go through 3 loops on the hook, yo, go through 2 loops on the hook
Pattern
(1) Ribbing
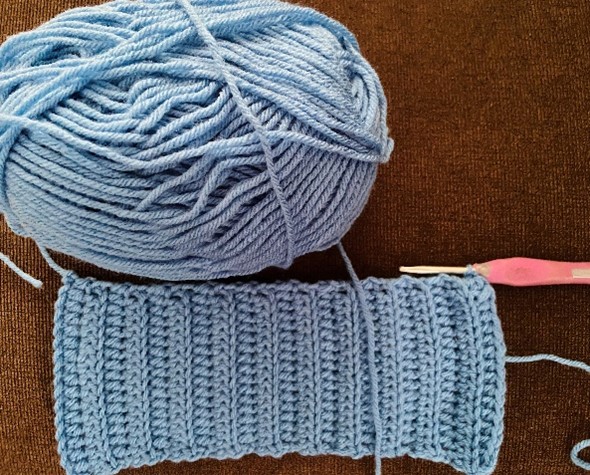
ch 18
R1
Into the 3rd ch from the hook – hdc, hdc all ch’s
R2
ch2, hdc all st’s (blo)
R3 to required length of Ribbing
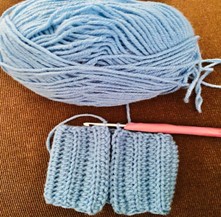
Repeat R2 until the Ribbing fits around the upper ankle as shown in image below
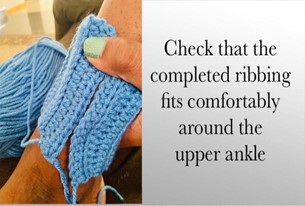
- Once the Ribbing fits around the upper ankle, join ends by sl st, stitch for stitch to join both ends
(2) Heel (working in-the-round)
R1
ch1, sc all along the edge of the Ribbing – ensure that the st’s are evenly spaced and uniform in size – sl st to join
ch2, hdc all st’s, sl st to join
R3
ch2, hdc all st’s, sl st to join
R4 (incr R)
ch3, incr, dc, incr, dc, incr, dc to 5 st’s before the end, incr, dc, incr, dc, incr, sl st to join.
R5
ch3, dc all st’s, sl st to join
R6 (incr R)
ch3, incr, dc, incr, dc to 3 st’s before the end, incr, dc, incr, sl st to join.
R7
ch3, dc all st’s, sl st to join
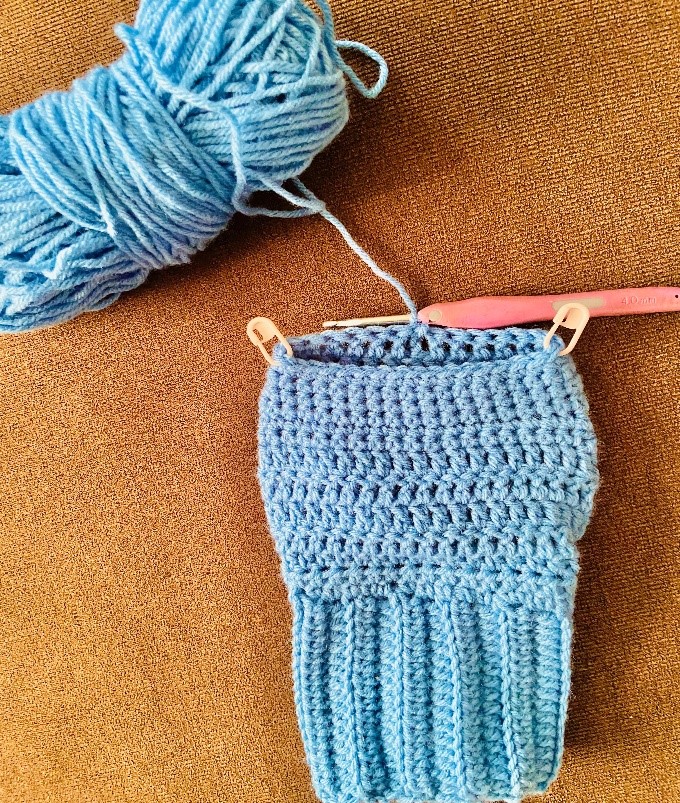
Mark off sides with a SM each before beginning R8
- Lay the piece flat with the start at the center – mark off either side with a SM each\
- see image below
R8
ch3, dc to SM1, hdc into st marked by SM1 (replace SM), sc all along the front to SM2, hdc into st marked by SM2 (replace SM), dc to end, sl st to join
R9
Repeat R8
R10 (decr R)
ch3, dec, dc, dec, dc to SM1, hdc into st marked by SM1 (replace SM), sc all along the front to SM2, hdc into st marked by SM2 (replace SM), dc to 5 st’s before the end, dec, dc, dec sl st to join
R11
ch3, dc to SM1, hdc into st marked by SM1 (replace SM), sc all along the front to SM2, hdc into st marked by SM2 (replace SM), dc to end, sl st to join
R12 (decr R)
ch3, dec, dc, dec, dc, dec, dc to SM1, hdc into st marked by SM1 (replace SM), sc all along the front to SM2, hdc into st marked by SM2 (replace SM), dc to 8 st’s before the end, dec, dc, dec, dc, dec sl st to join
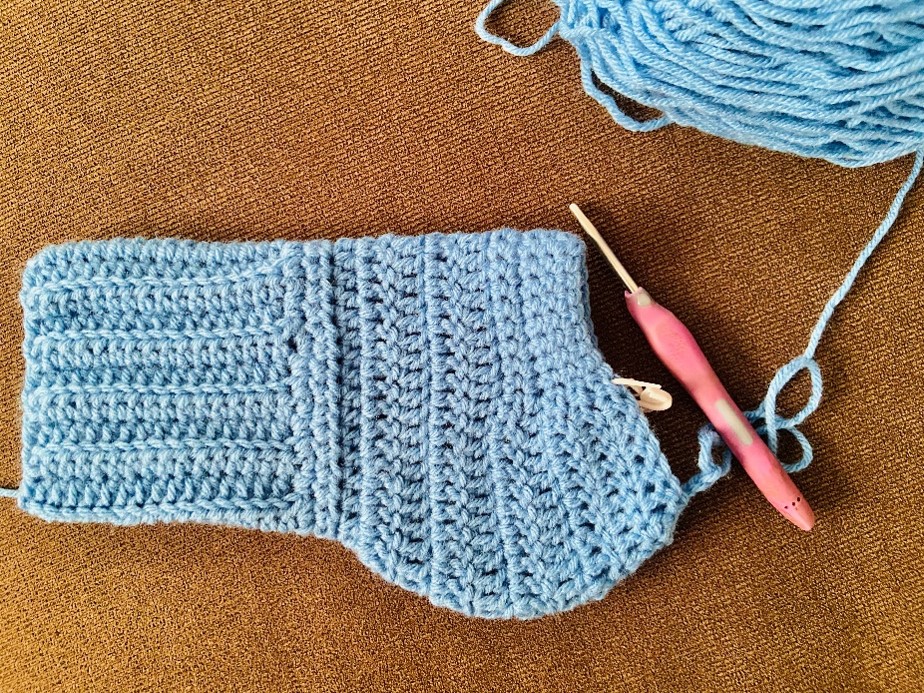
- Note: Should you not have enough st’s to work the decr, adjust the SM to accommodate the decr – thereafter work the hdc into the adjusted st and continue with sc’s. Adjust again at SM2 if necessary – in order to work the decr
(3) Body
It may be necessary to readjust the SM’s as they may not be on either side – they may have moved along the course of the pattern
Lay piece flat with the start at the centre – mark of either side with a SM each
R1
ch3, dc to SM1, hdc into st marked by SM1 (replace SM), sc all along the front to SM2, hdc into st marked by SM2 (replace SM), dc to end, sl st to join
R2
ch3, dc to SM1, hdc all along the front to SM2, dc to end, sl st to join – replace SM’s
R3
ch3, dc to SM1, hdc all along the front to SM2, dc to end, sl st to join – replace SM’s
R4
ch3, dc to SM1, hdc all along the front to SM2, dc to end, sl st to join – remove SM’s as they are no longer required
R5
ch2, hdc all st’s, sl st to join
R6 to R10
Repeat R5
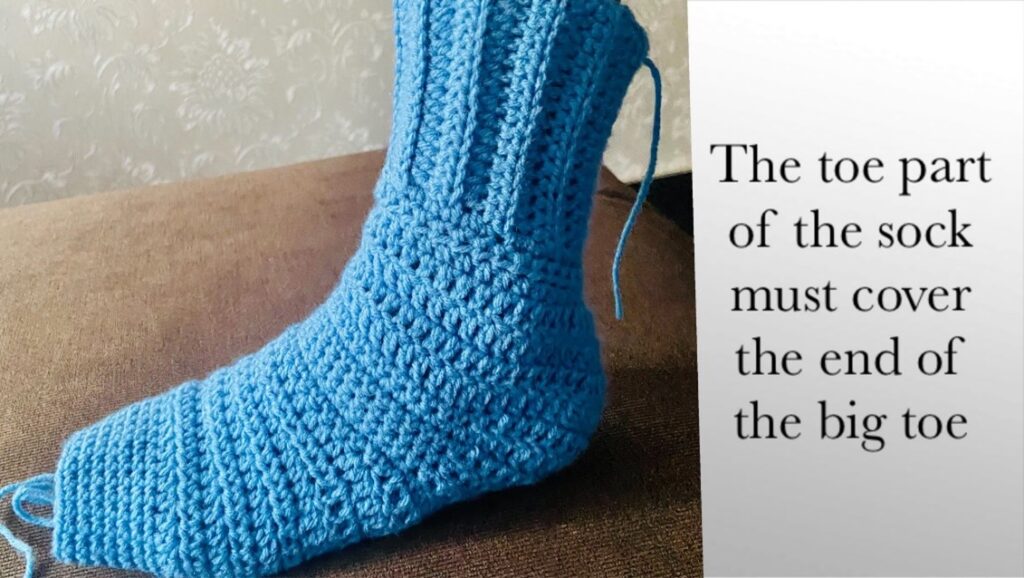
- Note: work as many repeats of R5 as need be to reach the beginning of the toes – see image below

(4) Toe
R23 to R34 (or as many R’s to complete)
ch1, sk 1st st – sc next st, sc all st’s, sl st to join
- Note: it is necessary to skip the first st to taper off
Fasten off, cut off excess yarn leaving a long enough tail to seam and gather up the st’s to close the toe opening
To close and complete
Using a yarn needle and the tail end of yarn, sew along the toe opening and gather up all the stitches to close. Take the tail end to the wrong side and weave in all the ends
And that’s a wrap😊

