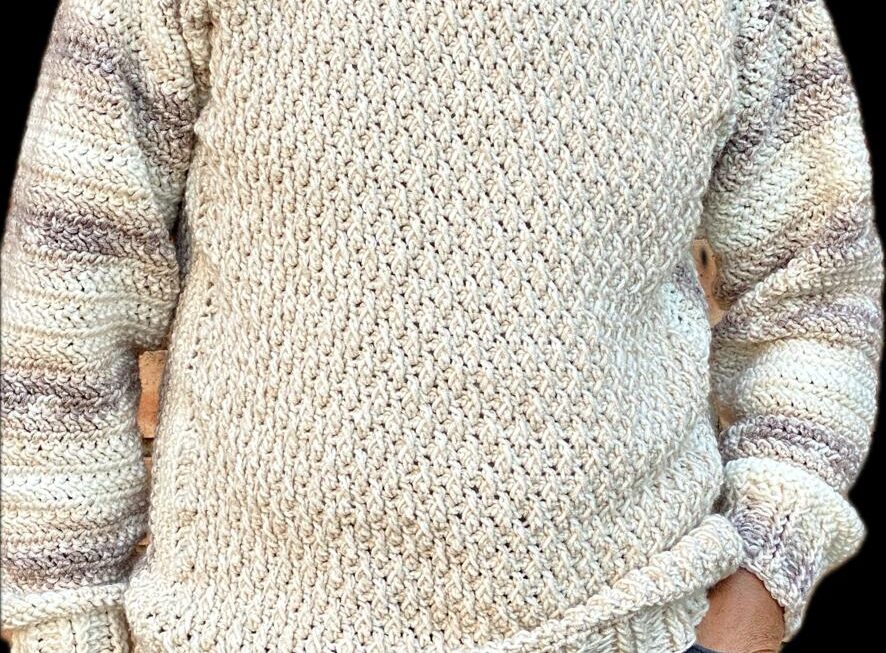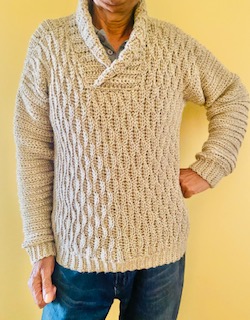
Wow, look at the stitch pattern on the front of this sweater… eye-catching! It’s called the Almond Ridge stitch pattern. Almond… yeah, I see it! This was a treat for me. I always find that the first time I use a stitch pattern, it’s like entering unknown territory, not knowing what the outcome will be. I’m pleased though 😉
Pattern Notes
- This sweater is made using one’s own body measurements – Standard Measurements for the various sizes are provided for in the pattern, however, should you wish to take your own measurements, by all means do so. You will need to take 1 measurement for the length of the sweater as required
- This pattern makes use of US crochet terminology
- Measurements are in inches and centimetres (cm)
- This pattern is for sizes:
- Men Small to 5XL
- This pattern is worked in panels: Back panel, Front panel. The sleeves and ribbings are worked directly onto the body of the sweater
- Basic knowledge of stitches needed: half double crochet, single crochet, chain, slip stitch
- ch2 counts as a stitch (hdc)
- Increase (incr) – work 2 stitches into 1 stitch
- Decrease (decr) – work 1 stitch into 2 stitches – yo, insert hook into first stitch, pull up a loop, insert hook into next stitch, pull up a loop, yo, go through all 4 loops on the hook
- hdc4 means work 1 hdc into each of the next 4 st’s
- sl st x 4 means work 1 slip stitch into each of the next 4 st’s
- For the Back panel and Sleeves – stitches are worked into the blo (back loops only for R2 and repeats of R2, and flo (front loops only) for R3 and repeats of R3
- For the Front panel – stitches are worked into the blo (back loops only)
- The Almond Ridge stitch pattern for the front panel is a 4 Round repeat. Rounds R2 and R3 are the same and Rounds R4 and R5 are the same
- When working slip stitches – keep your stitches loose
- Front Panel – Almond Ridge Stitch Pattern
Video Tutorial
Need help with the pattern, check out
Stitches and Abbreviations
ch/ ch’s = chain/s
st/ st’s = stitch/ stitches
sc/ sc’s = single crochet/ s
hdc = half double crochet
sk = skip
sl st = slip stitch
sp/s = space/es
WS = Wrong side
RS = Right Side
R = Round
SM = Stitch marker
incr = increase (work 2 stitches into 1 stitch)
decr = decrease
yo = yarn over
blo = back loops only
flo = front loops only
CF = centre front
CB = centre back
Materials
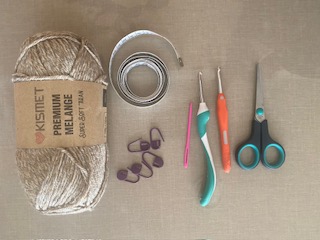
Yarn/ wool – Aran/ Category 4/ worsted weight (I used approx. 850g for a size Medium – also depending on the length)
4mm crochet hook for the ribbings
5mm hook for the rest of the sweater
Scissors
Stitch markers
Measuring tape
Yarn/ wool needle
PATTERN
Back Panel – using the 5mm hook
Chain a length of chains that measures from the shoulder to the upper hip (measure this chain against the physical body) – Count the number of ch’s and adjust the chain count to a multiple of 8 + 5 (I used 77 ch’s)
R1 (work your st’s into the little bumps at the back of the chain)
Into the 3rd ch (bump) from the hook – hdc, hdc all ch’s (bumps)
Note that the first 2 skipped st’s count as the first stitch
R2
ch2, turn, hdc all st’s (blo)
R3
ch2, turn, hdc all st’s (flo)
Repeat R2 and R3 until the width of the back panel measures the shoulder to shoulder measurement for the size you are making plus 2”or 5cm
Shoulder to shoulder measurements
MENS MEASUREMENTS
S 16 inches 40,5cm
M 17 inches 43cm
L 18 inches 45,5cm
XL 18,5 inches 47cm
2XL 19,5 inches 50cm
3XL 20,5 inches 52cm
4XL 21,5 inches 54,5cm
5XL 22,5 inches 57cm
Fasten off – cut off excess yarn
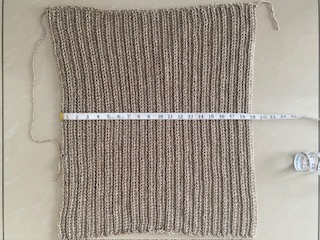
Back panel for a size Medium
Fold the back panel in half along the length of the panel – mark off the folded edge – CB
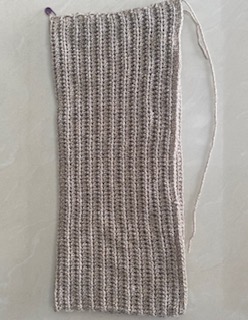
Open up the back panel and lay flat – Mark off the neckline on either side of CB
S to 2XL 3,5” or 9cm TOTAL NECKLINE 7” or 18cm
3XL to 5XL 4,5” or 11,5cm TOTAL NECKLINE 9” or 23cm
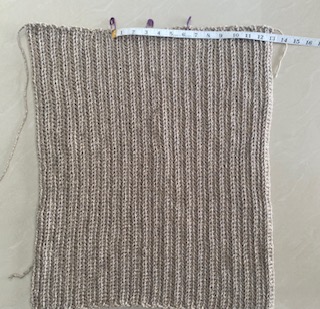
We will now use the back panel as a guide when working the front panel
Front Panel – using the 5mm hook
Shoulder (1)
R1
Chain a length of chains that is 1 chain longer than that chained for the back panel (I chained 78 ch’s)
R1 (work st’s into the little bumps along the back of the chain)
Into the 3rd ch (bump) from the hook – hdc, hdc all ch’s (bumps)
Note that the first 2 skipped st’s count as the first stitch
R2 (work st’s into the back loops only)
ch1, turn, *sl st x 4, hdc4*
Repeat from *to* ending with sl st x 4
R3 (work st’s into back loops only)
ch1, turn, *sl st x 4, hdc4*
Repeat from *to* ending with sl st x 4
Note for R2 and R3 – make certain to work sl st’s from R3 into sl st’s from R2 and hdc’s from R3 into hdc’s from R2
R4 (work st’s into back loops only)
ch1, turn, *hdc4, sl st x 4*
Repeat from *to* ending with hdc4
Note for R3 and R4 – make certain to work sl st’s from R4 into hdc’s from R3 and hdc’s from R4 into sl st’s from R3
R5 (work st’s into back loops only)
ch1, turn, *hdc4, sl st x 4*
Repeat from *to* ending with hdc4
Note for R4 and R5 – make certain to work sl st’s from R5 into sl st’s from R4 and hdc’s from R5 into hdc’s from R4
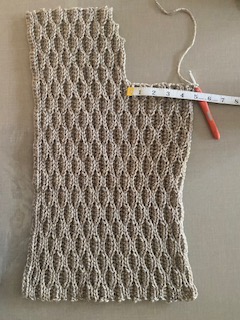
Repeat R2 to R5 until the front panel when placed on top of the back panel (laid out flat) the front panel lines up with the SM1 making off the neckline
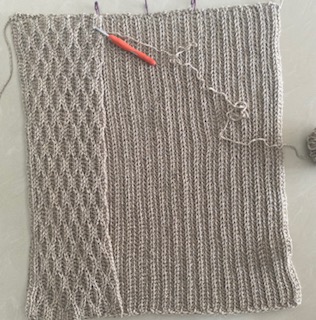
Neckline
Continuing from Shoulder (1), skipping the last 4 st’s at the top edge
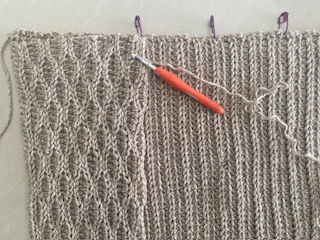
Follow the Almond Ridge Stitch pattern sequence, continuing from the Round you stopped at for 2 Rounds working your way back to the Top edge
Skip last 4 st’s (Neckline)
Follow the Almond Ridge stitch pattern sequence, continuing from the Round you stopped at for 2 Rounds working your way back to the top edge
Skip last 12 st’s (Neckline)
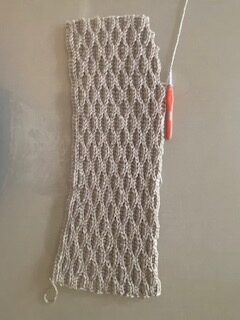
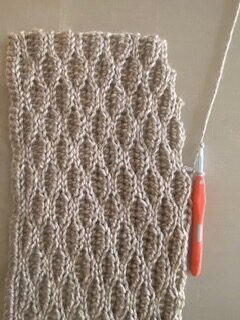
Follow the Almond Ridge Stitch pattern sequence, continuing from the Round you stopped at for 2 Rounds working your way back to the Top edge
Repeat R2 to R5 until the Neckline measures
S to 2XL 5” or 12cm
3XL to 5XL 7” or 18cm
Shoulder (2)
Continuing from Neckline (Top edge), ch13
Note – the last chain counts as the turning chain
Follow the Almond Ridge Stitch pattern sequence, continuing from the Round you stopped at for 2 Rounds working your way back to the Top edge
ch5,
Note – the last chain counts as the turning chain
Follow the Almond Ridge Stitch pattern sequence, continuing from the Round you stopped at for 2 Rounds working your way back to the Top edge
ch5
Note – the last chain counts as the turning chain
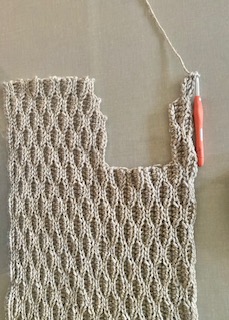
Follow the Almond Ridge Stitch pattern sequence, continuing from the Round you stopped at until the width of the Front panel measures the shoulder to shoulder measurement for the size you are making plus 2”or 5cmOR measures the same as the Back panel
End the Front panel with ch2, turn, hdc all st’s
Fasten off – cut off excess yarn
Assembly
Lay Front panel on top of the Back panel – Aligning well
Seam along shoulders to join
Neckline Ribbing – using the 4mm hook
Attach yarn to Neckline at the corner at CF
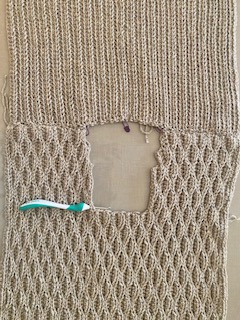
S to 2XL ch14
3XL to 5XL ch18
R1
Into the 3rd ch from the hook – hdc, hdc all ch’s (13 st’s/ 17 st’s)
R2
sl st x 2, hdc all st’s (blo) (13st’s/ 17st’s)
R3
ch2, turn, hdc all st’s (blo) (13st’s/ 17st’s)
Repeat R2 and R3 until you get to the “notch 1” at the neckline
At the “notch 1”, sl st x 2 into the “notch”, increase stitch count by working st’s into the sl st’s – st count will increase to 15st’s/ 19st’s
Repeat R2 and R3 until you get to the “notch 2” at the neckline
At the “notch 2”, sl st x 2 into the “notch”, increase stitch count by working st’s into the sl st’s – st count will increase to 17st’s/ 21st’s
Repeat R2 and R3 around the neckline until you get to the “notch 3” (on the opposite side) at the neckline
At the “notch 3”, sl st x 2 into the “notch”, decrease stitch count by skipping st’s – st count will decrease to 15st’s/ 19st’s
Repeat R2 and R3 around the neckline until you get to the “notch 4” at the Neckline
At the “notch 4”, sl st x 2 into the “notch”, decrease stitch count by skipping st’s – st count will decrease to 13st’s/ 17st’s
Repeat R2 and R3 to complete the Ribbing stopping at the corner at CF
Fasten off – leaving a long enough tail to help seam the Ribbing edges to the Neckline at CF
Seam the edges of the Ribbing to the Neckline to join
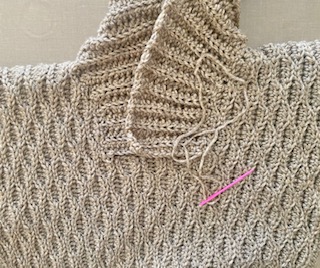
Mark off the Armhole Depth for the size you are making
Armhole Depth:
MENS MEASUREMENTS
S 7,5 inches 19cm
M 8 inches 20cm
L 8,5 inches 21,5cm
XL 9 inches 23cm
2XL 10 inches 25,5cm
3XL 10,5 inches 26,5cm
4XL 11 inches 28cm
5XL 11,5 inches 29cm
Seam along the side from SM at armhole to bottom on either sides to join
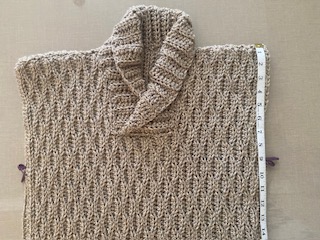
Sleeve – using the 5mm hook
Attach yarn to the underarm of the armhole
R1
ch2, turn, hdc all st’s (blo), sl st to join
R2
ch2, turn, hdc all st’s (flo), sl st to join
Repeat R1 and R2 until the required length of sleeve
Note: to taper off the sleeve after the elbow, work decrease Rounds after every 3 Rounds as follows:
ch2, decr, hdc all st’s (flo or blo) to last 2 st’s, decr, sl st to join
Sleeve Ribbing – using the 4mm hook
Continuing from sleeve, ch9
R1
Into the 2nd ch from the hook – sc, sc all ch,s (8 st’s)
R2
sl st x 2, sc all st’s (blo) (8st’s)
R3
ch1, turn, sc all st’s (blo) (8st’s)
Repeat R2 and R3 all around the sleeve
Seam up edges to join
Repeat for other sleeve
Bottom Edging/ Ribbing – using the 4mm hook
Attach yarn to bottom of sweater at CB
ch9 and repeat as for sleeve ribbing
Note – there are no stitches to work into, work your sl st’s into the little gaps along the bottom edge of the sweater
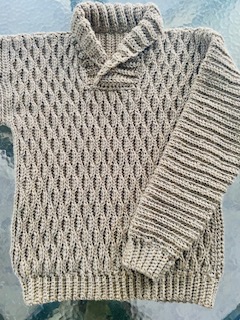
Fasten off, cut off excess yarn, weave in all ends to complete
