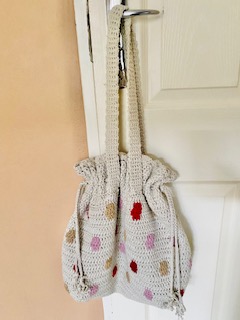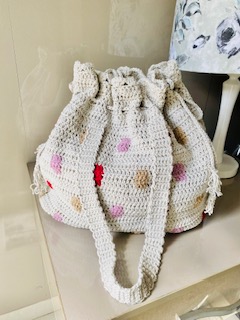
This pattern is the fifth of my “Polka Dot” range. I enjoyed working the polka dots for the other patterns (I’ve got the Scarf, Beanie, Cardigan and Sweater in this range) and I thought it would look great on a bag.
I’ve made this bag, at least a fabric version of this once before so I had some idea of how I would go about the pattern. This pattern is worked in 4 parts. We begin at the Base, then its onto Side(1) where we start working those Polka Dots. Side (2) is a repeat of Side(1) and we finish off with all the details like preparing the lining, the Assembly, the Top Edging, the Straps and the Drawstrings.
This bag measures 16″ or 41cm in both width and height. You will need yarns of different colors, one color for the base which will make up the majority of the bag and different colors for the Polka Dots. I went with a beige yarn for the majority of the bag and for the Polka Dots, I used red, pink and brown. Please note that the weight of the yarns used for both the bag itself and the Polka Dots must be the same. Stick with Double Knit/ category 3/ light worsted yarn throughout the pattern.
Pattern Notes
- This pattern is one size, 16″ or 41cm height and 16″ or 41cm in width
- This pattern makes use of US crochet terminology
- Measurements are in inches and centimeters
- ch2 at the start of every Round counts as a stitch (double crochet)
- dc3/ dc5, etc means 3 or 5, etc double crochets worked in the same/ base colour yarn
- brackets indicate stitches to be worked in the change of colour example (dc3) or (dc4) – you will change the colour of the yarn to work the Polka Dot pattern which is indicated by ( ) either working 3 dc’s or 4 dc’s – The video tutorial shows how to go about changing yarn
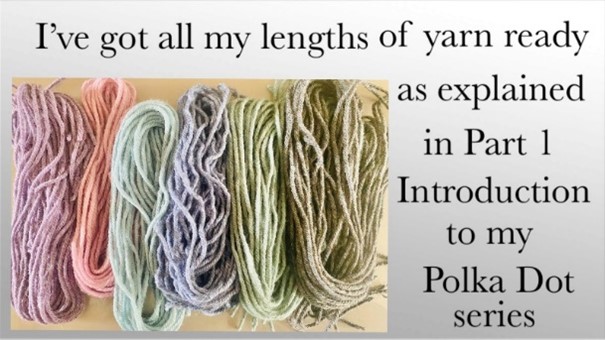
- Decide on your chosen colours ie, the base colour and the colours of the Polka Dots – The Polka Dots are indicated in brackets ( ) in the pattern – See Swatch on how to get the lengths of yarn needed for the Polka Dots
To form drawstrings (I made two of these)
Form a slip knot – leaving behind a long tail (approx 100″or 2,45metres)
Wrap the tail end over the hook. while holding onto the little bump, pull up a loop, go through 2 loops on the hook, *wrap the tail end over the hook, pull up a loop and go through 2 loops on the hook*
Repeat from *to* until the tail end of yarn has been used up. Fasten the end by knotting. Form tassels and attach to the ends of the drawstrings
Materials
Yarn/ wool – 100% cotton category 3/ light worsted/ double knit (colors as per your preference)
3mm crochet hook
Stitch markers
Scissors
Measuring tape
Yarn/wool needle
Lining – any good quality cotton fabrics will do
Needle and thread
Sewing pins
Stitches and Abbreviations
ch/ ch’s = chain/s
st/ st’s = stitch/ stitches
sc/ sc’s = single crochet/ s
dc = double crochet
sk = skip
sl st = slip stitch
sp/s = space/es
WS = Wrong side
RS = Right Side
R = Round
SM = Stitch marker
yo = yarn over
Video Tutorial
Check out the video tutorial here
Check out how to work a swatch and prepare the lengths of yarn for the Polka Dots here
Swatch
ch11
R1
Into the 4th st from the hook dc, dc all chs
R2
ch3, turn, dc3, (dc3), dc4
R3
ch3, turn, dc2, (dc5), dc3
R4
ch3, turn, dc3, (dc3), dc4
Open the swatch – take note of the length of yarn used for the change of colour (st’s in brackets), add on an 8”allowance. Now you have an idea of the lengths of yarn needed to form the Polka Dots
Tip: Prepare the lengths of yarn for the Polka Dots in advance
Note : This pattern differs slightly from the Introduction video tutorial but that does not affect the outcome
Pattern
Part 1 – Base
- Using the base color
ch 49
R1
Into the 4th ch from the hook – dc, dc all ch’s (47 st’s)
R2
ch2, turn, dc all st’s (47 st’s)
R3 to R11
Repeat R2 to complete the base. The base now measures 12″ or 30cm in length and 5″ or 13cm in width
Part 2 – Side (1)
Continuing from where you stopped at the base
R1
ch13 and fasten off – cut off excess yarn
Attach yarn to the opposite side, ch15, turn, into the 4th ch from the hook – dc, dc all ch’s, dc all st’s, dc all ch’s (73 st’s)
Make certain that you have 13 st’s worked into the chain, 47 st’s and then again 13 st’s into the chain, adding up to 73 st’s in total
R2
ch2, turn dc all st’s (73 st’s)
R3
ch2, turn, dc5, (dc3), *dc9, (dc3)*
Repeat from *to* ending with dc6
R4
ch2, turn, dc4, (dc4), *dc8, (dc4)*
Repeat from *to* ending with dc6
R5
ch2, turn, dc5, (dc3), *dc9, (dc3)*
Repeat from *to* ending with dc6
R6
ch2, turn, dc into all st’s
R7
ch2, turn, dc into all st’s
R8
ch2, turn, dc into all st’s
R9
Begin with a change of colour for the first polka dot
(ch2), turn, (dc2), *dc9, (dc3)*
Repeat from *to* ending with dc10
R10
ch2, turn, dc8,*(dc4), dc8*
Repeat from *to* ending with (dc4)
R11
(ch2), turn, (dc2), *dc9, (dc3)*
Repeat from *to* ending with dc10
R12
ch2, turn, dc into all st’s
R13
ch2, turn, dc into all st’s
R14
ch2, turn, dc into all st’s
R 15 to R26
Repeat R3 to R14
Fasten off, cut off excess yarn
Part 3 – Side (2)
Attach yarn to the opposite side of the base to work Side(2)
Repeat as for Side(1) R1 to R26
Fasten off, cut off excess yarn
Knot together all ends to secure
Part 4
To cut Lining
- Using the crochet piece as a guide to cut the lining – lay the lining out flat, placing the crochet piece on top – Leving a 3″ or 8cm seam allowance along the top edges and a 3/4″ or 1,5cm seam allowance along all other edges – see image below
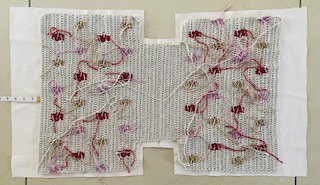
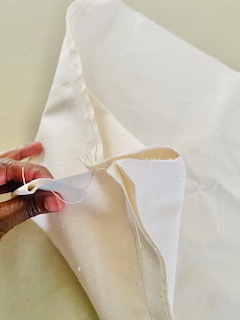
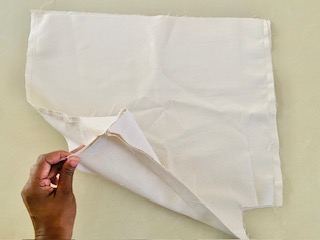
To stitch Lining
- Fold the lining in half – Fold along the base
- Stitch along both sides
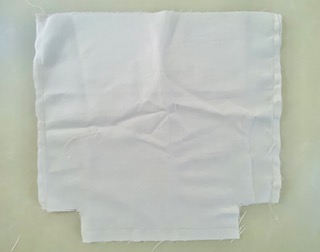
Stitch along the bottom sides (those squared off bottom edges) see images below
To seam the bag together:
- Fold the piece in half – Fold along the base
- Seam along both sides
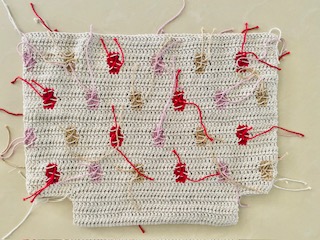
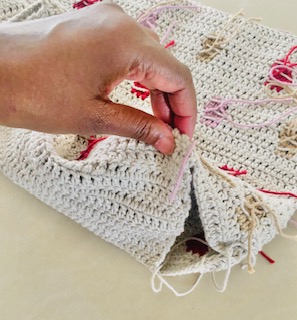
Seam along the bottom sides (those squared off bottom edges) see images below
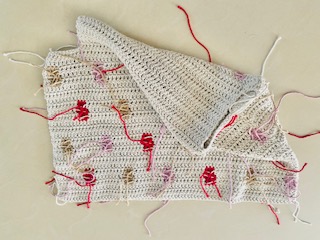
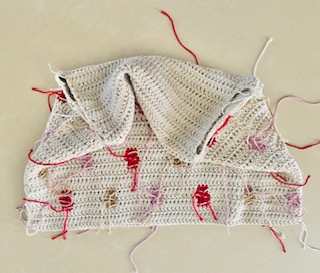
Assembly
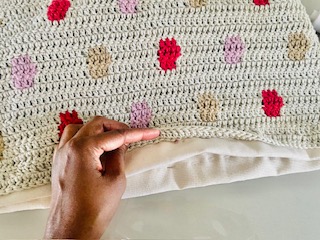
Now that the lining in stitched and the crochet piece is seamed, get the lining in place by fitting the lining into the bag (Lining WS facing out and crochet piece WS facing in)
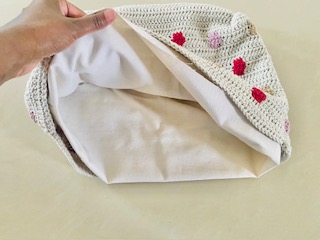
Leave the to edge of the lining sticking out slightly
Pin the lining in place before stitching – I chose to hand stitch the lining to the bag as I found stitching by sewing machine caused the crochet bag to pucker up
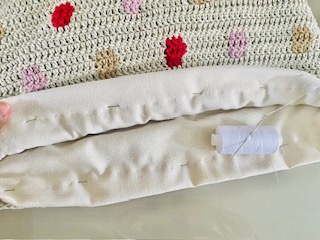
Top Edge
Attach yarn to the top edge – see image below
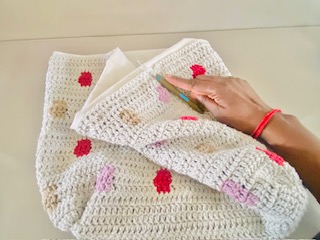
R1
ch2, dc all around the top edge, sl st ti join
R2
ch2, turn, dc3, *ch1, sk1, dc3*
Repeat from *to* to end, sl st to join
R3
ch2, turn dc all st’s, dc into all ch1 sp’s, sl st to join
R4
ch2, turn dc all st’s, sl st to join
R5
ch2, turn, dc2 into same st as ch2, sk3, *dc5, sk3*
Repeat from *to* ending with dc2 into same st as ch2, sl st to join
Fasten off, cut off excess yarn
Straps
Decide on placement of straps using SM’s as guides – see image below
Do the same on the other side
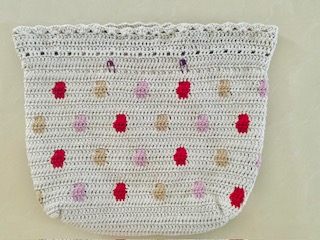
Attach yarn to the post of the stich
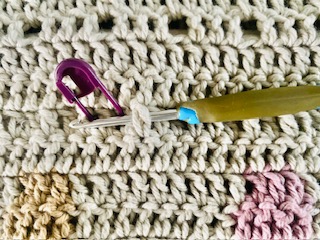
Use 5 posts to work each strap. You will work 1 straps on each side and then join those straps onto the other side of the bag
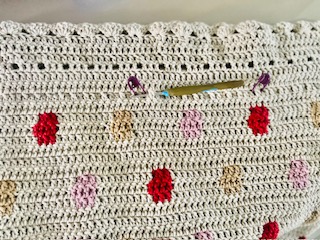
Strap 1
R1
ch1, sc into the next 4 posts
R2
ch1, turn, sc into same st as ch1, sc4
R3 to required length of strap – Repeat R2
Fasten off, cut off excess yarn
Repeat for strap 2
Seam straps on opposite side to form the handles for the bag – Form drawstrings (see To form Drawstrings in Pattern Notes) and weave through ch1 spaces along the top edge of the bag.
Weave in all ends to complete
